Toyota Crown JZS171 Noisy Air Vent Motors Repair
This seems to be a common issue for Toyota’s from the early to mid-2000s - air vent motors producing “chattering” or “hamster wheel” noises from within the dash somewhere. In my case, the noise graduated to a loud whirring/grinding noise so I bit the bullet and investigated the issue.
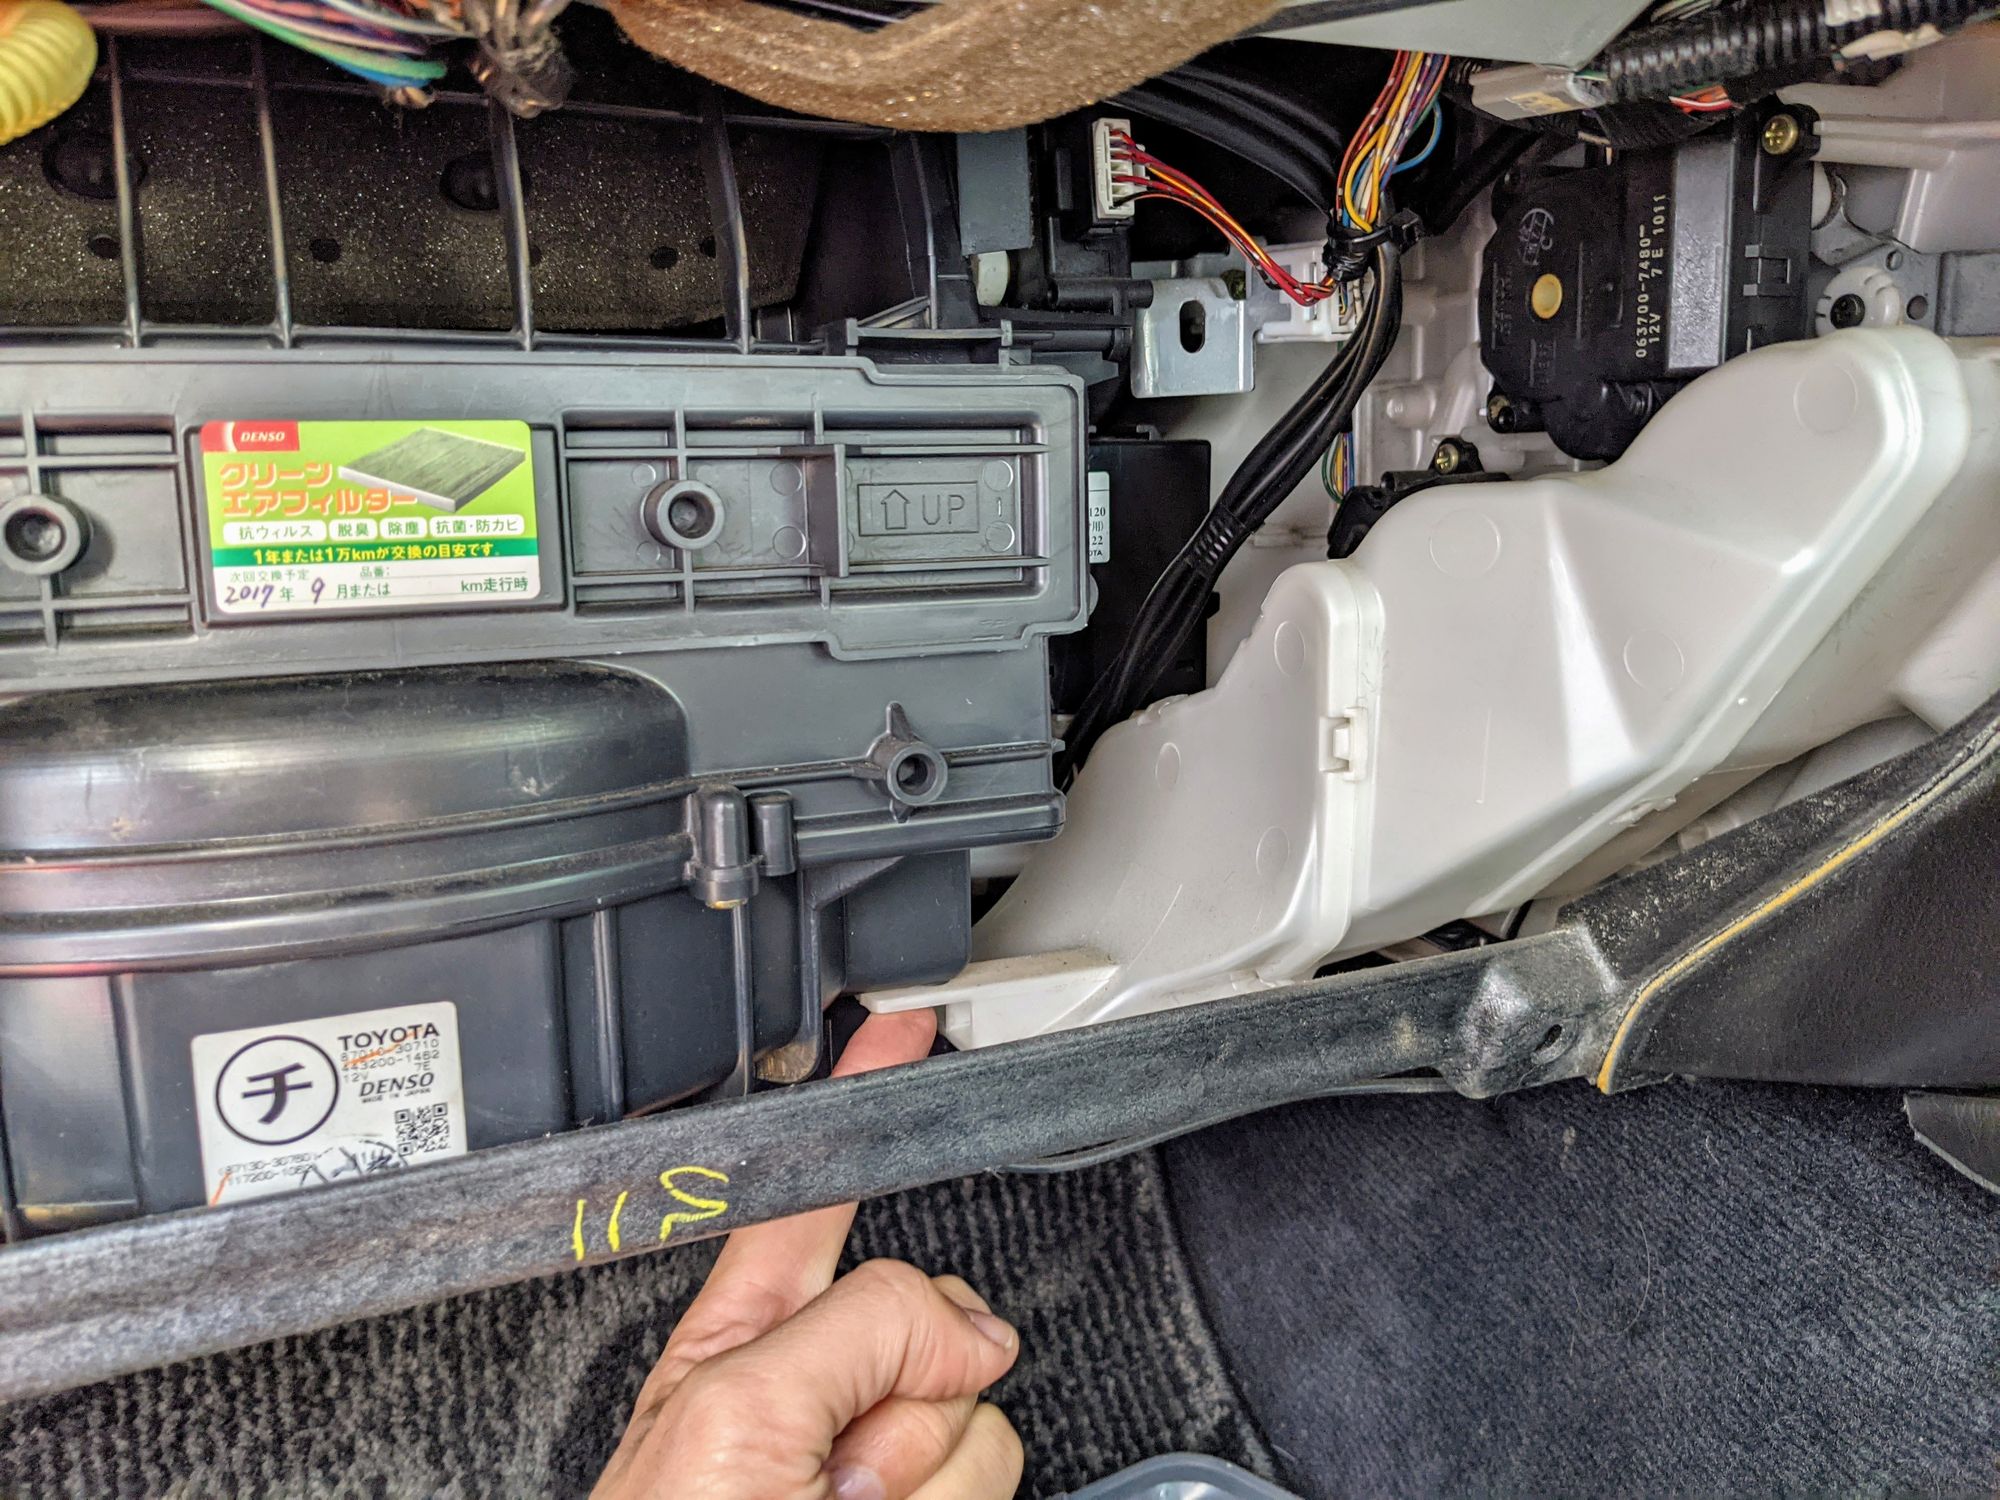
I found the noises to be coming from the centre console on the passenger side. I have not investigated the driver’s side where I believe there is another motor located.
Removing the Dash Trim
For the JZS171, accessing both the mode-select and speed-select motors is just a case of removing the glovebox.
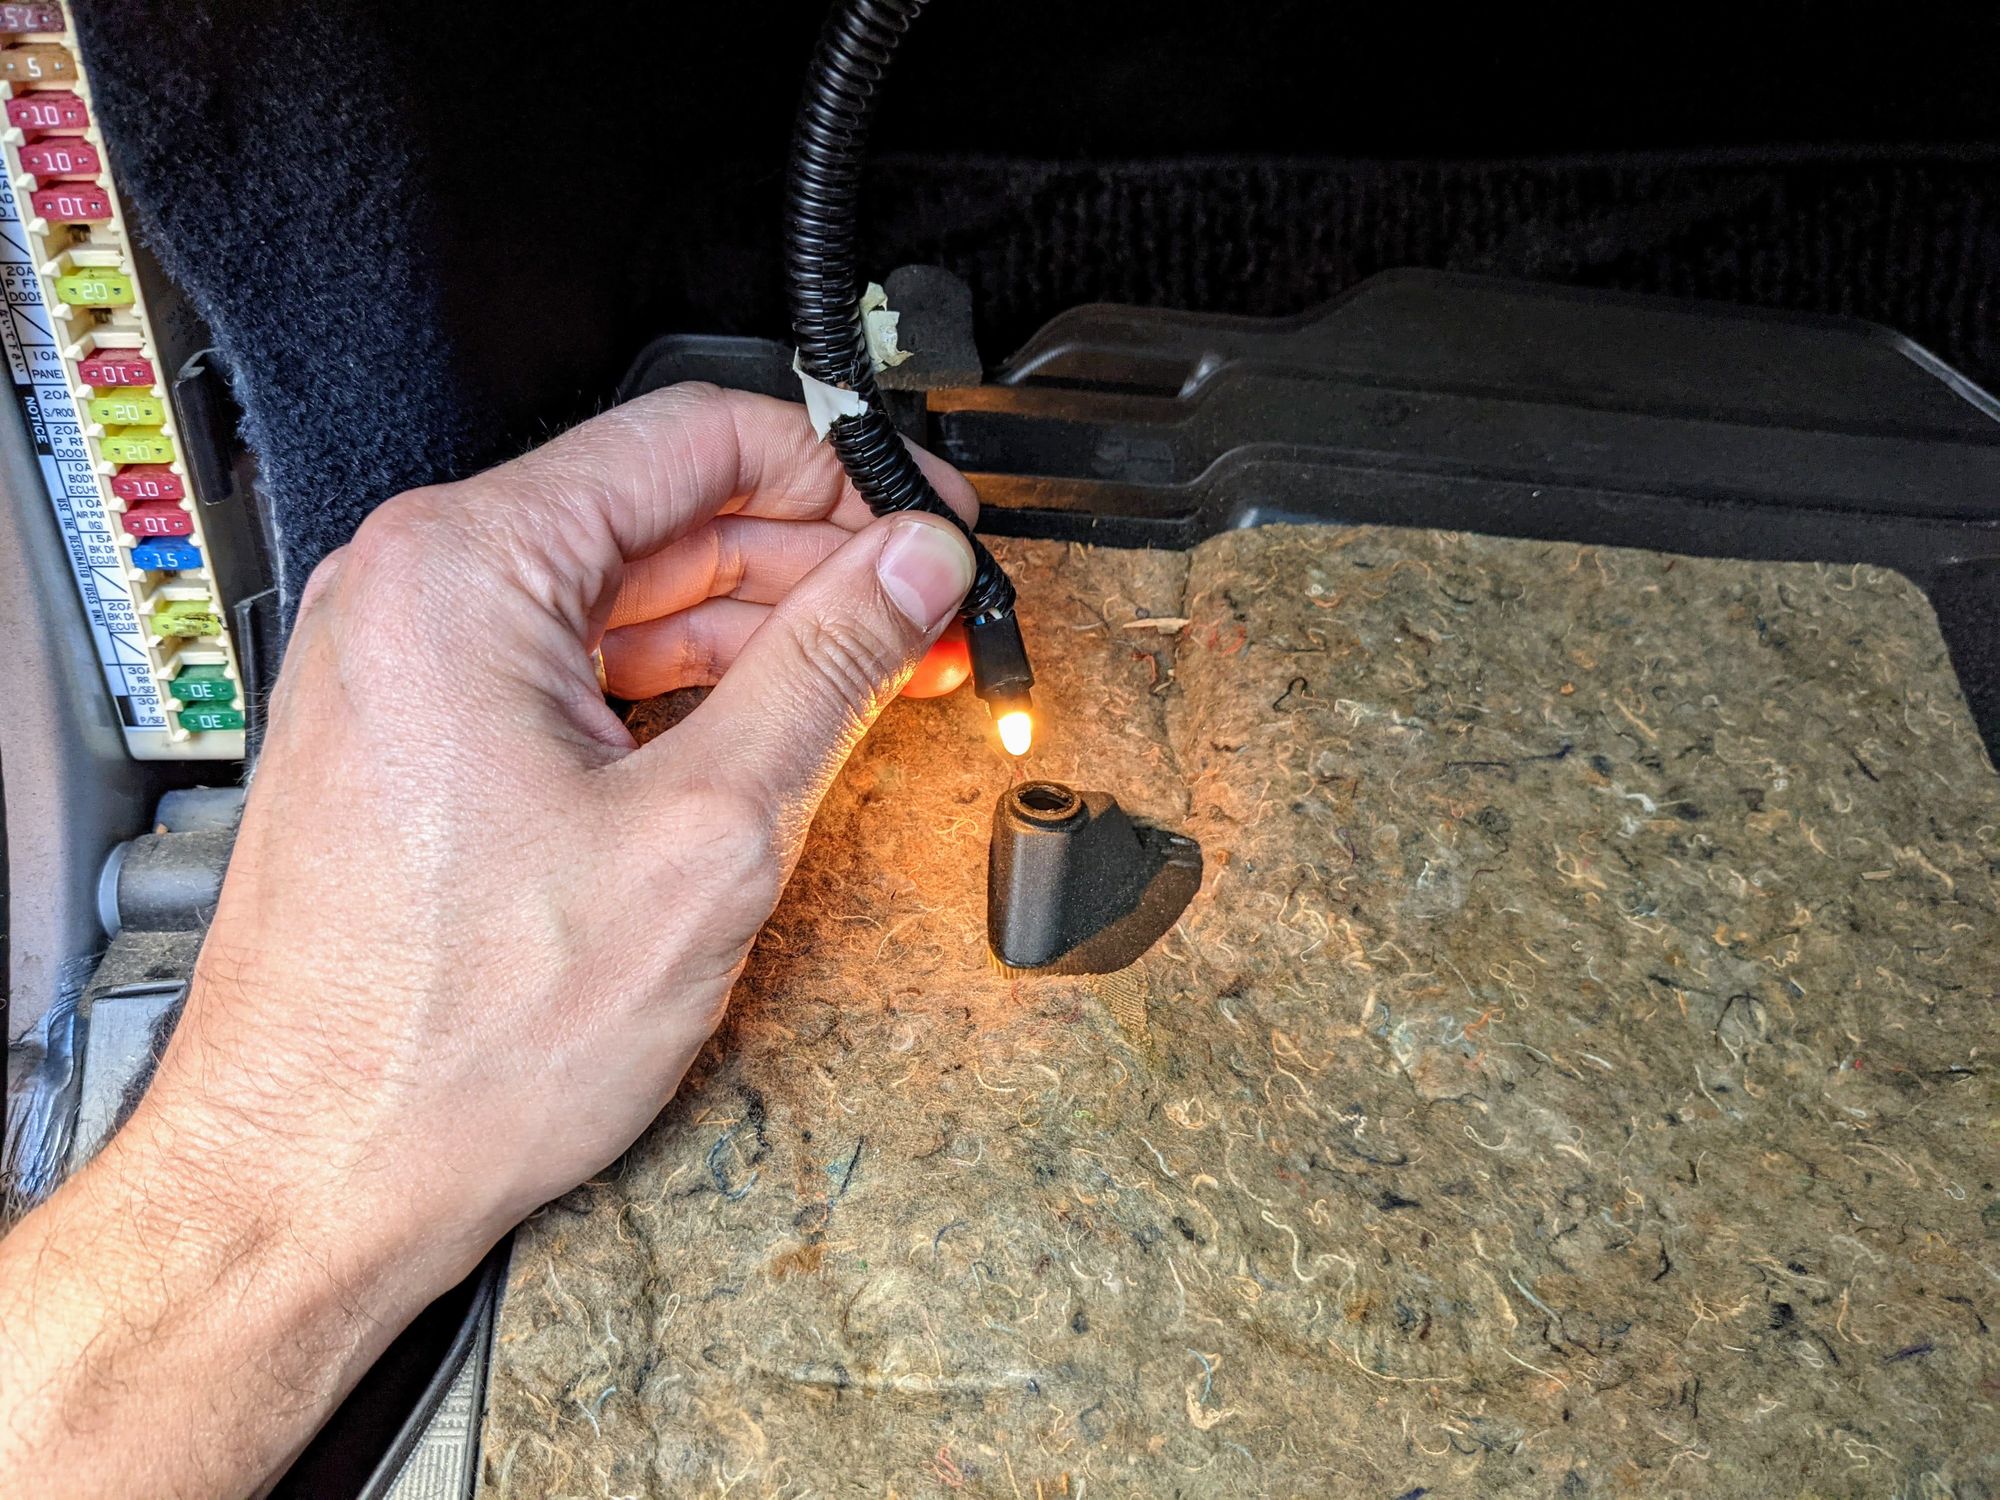
The lower trim underneath the glovebox has 3 clips holding it in - just pull the trim off carefully and twist out the courtesy light bulb.
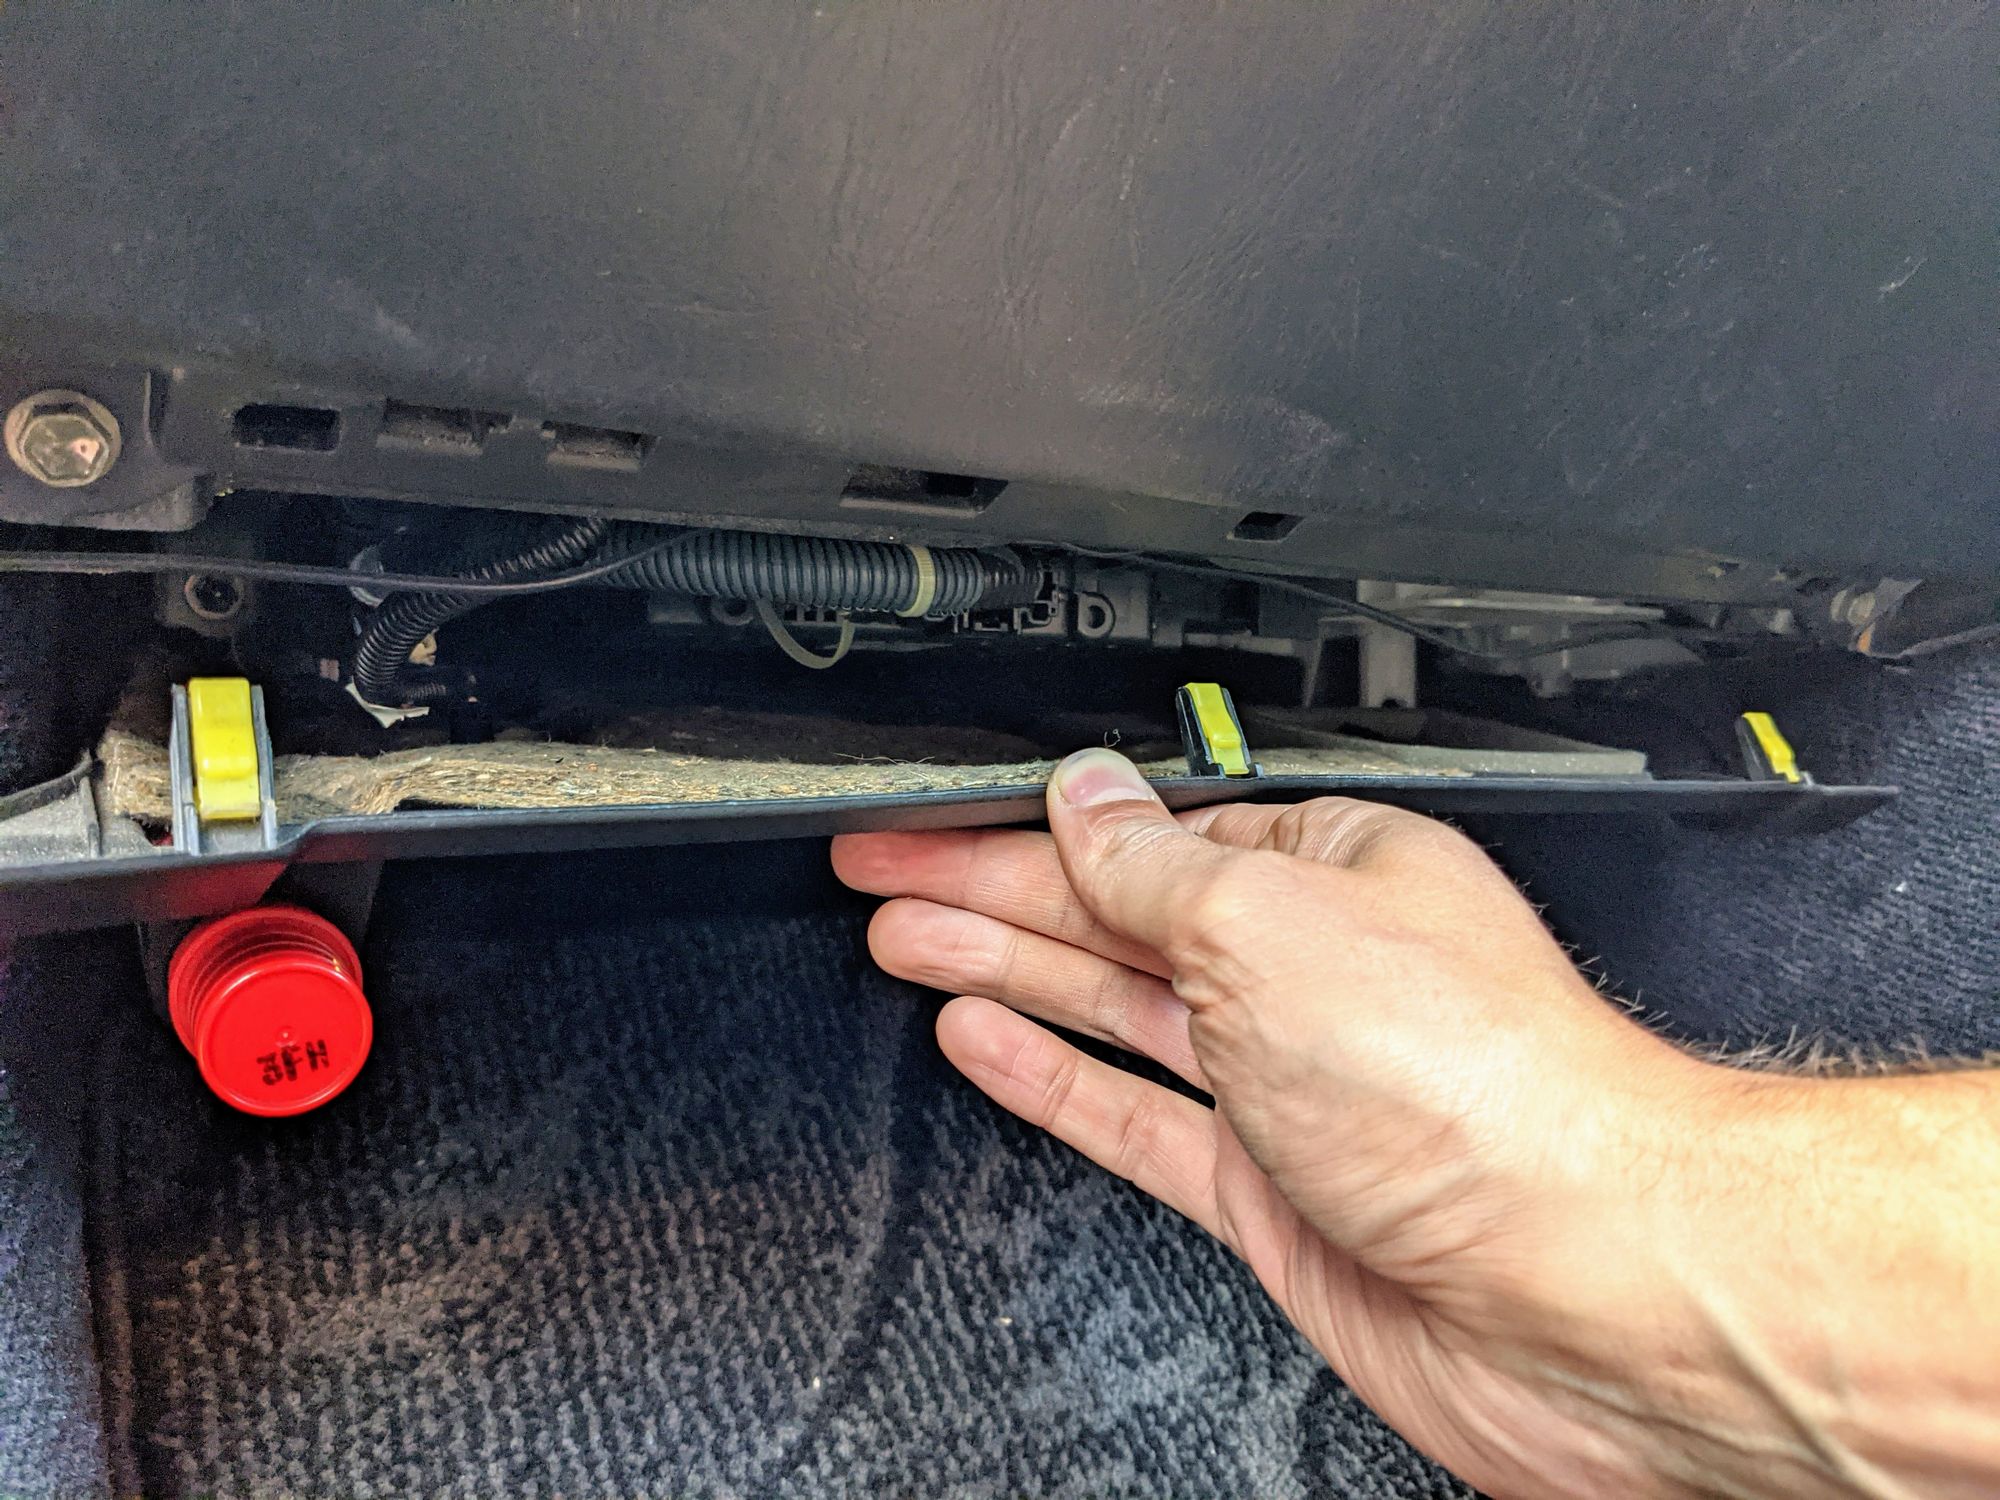
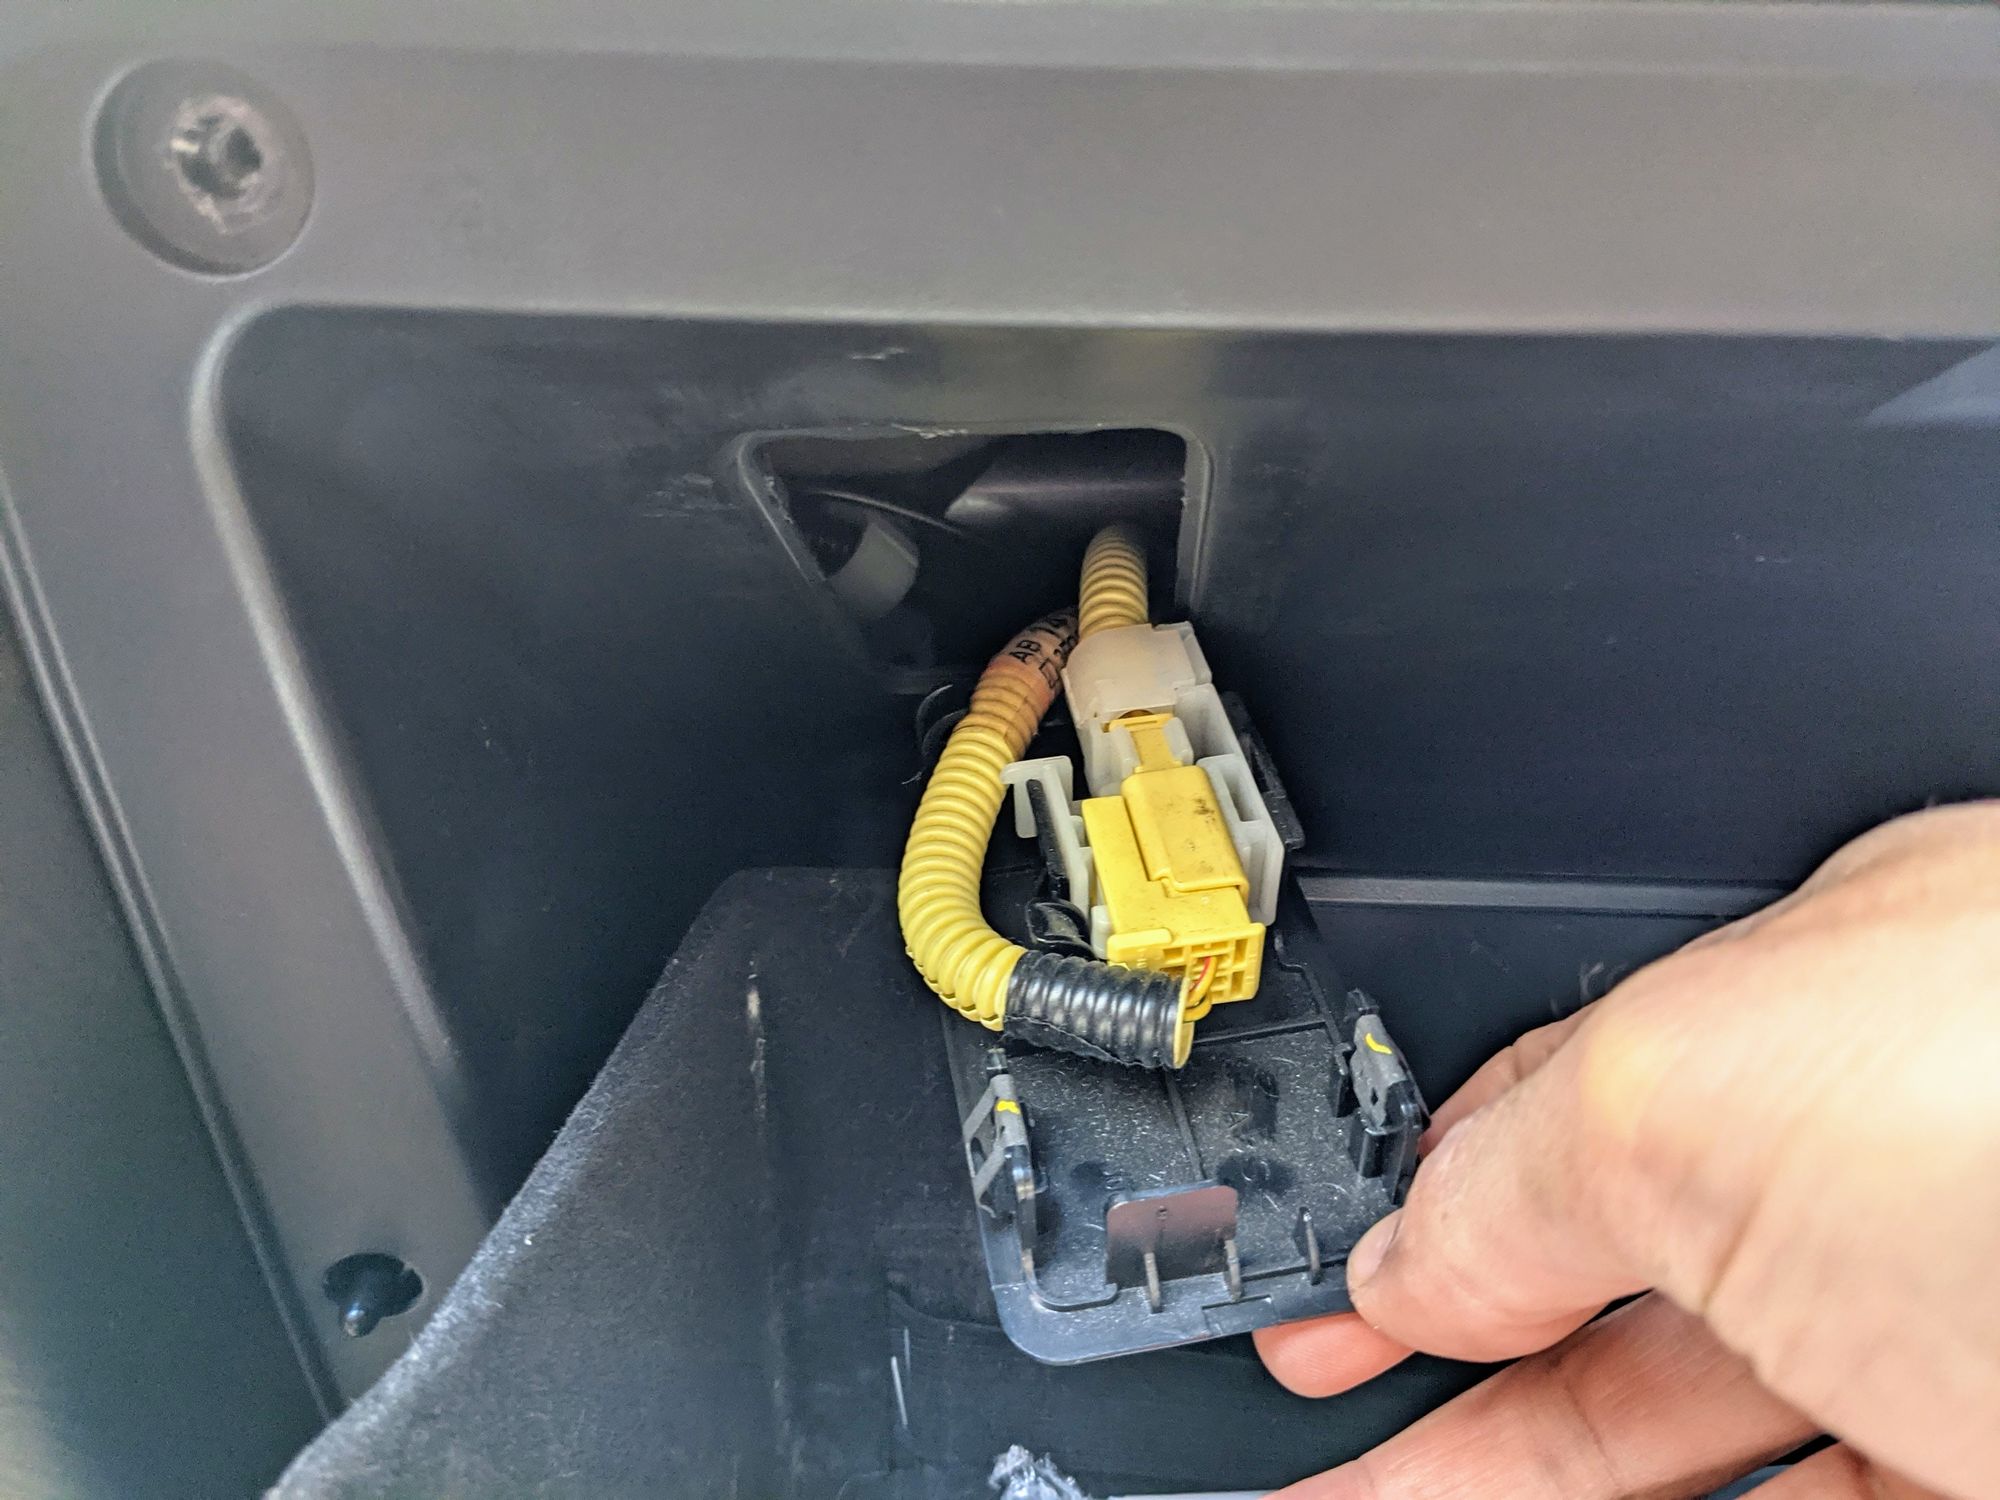
Next, open the glovebox and pry off the small rectangular panel in the topside left. There are yellow cables attached to this so just push it back through the hole and out of the way.
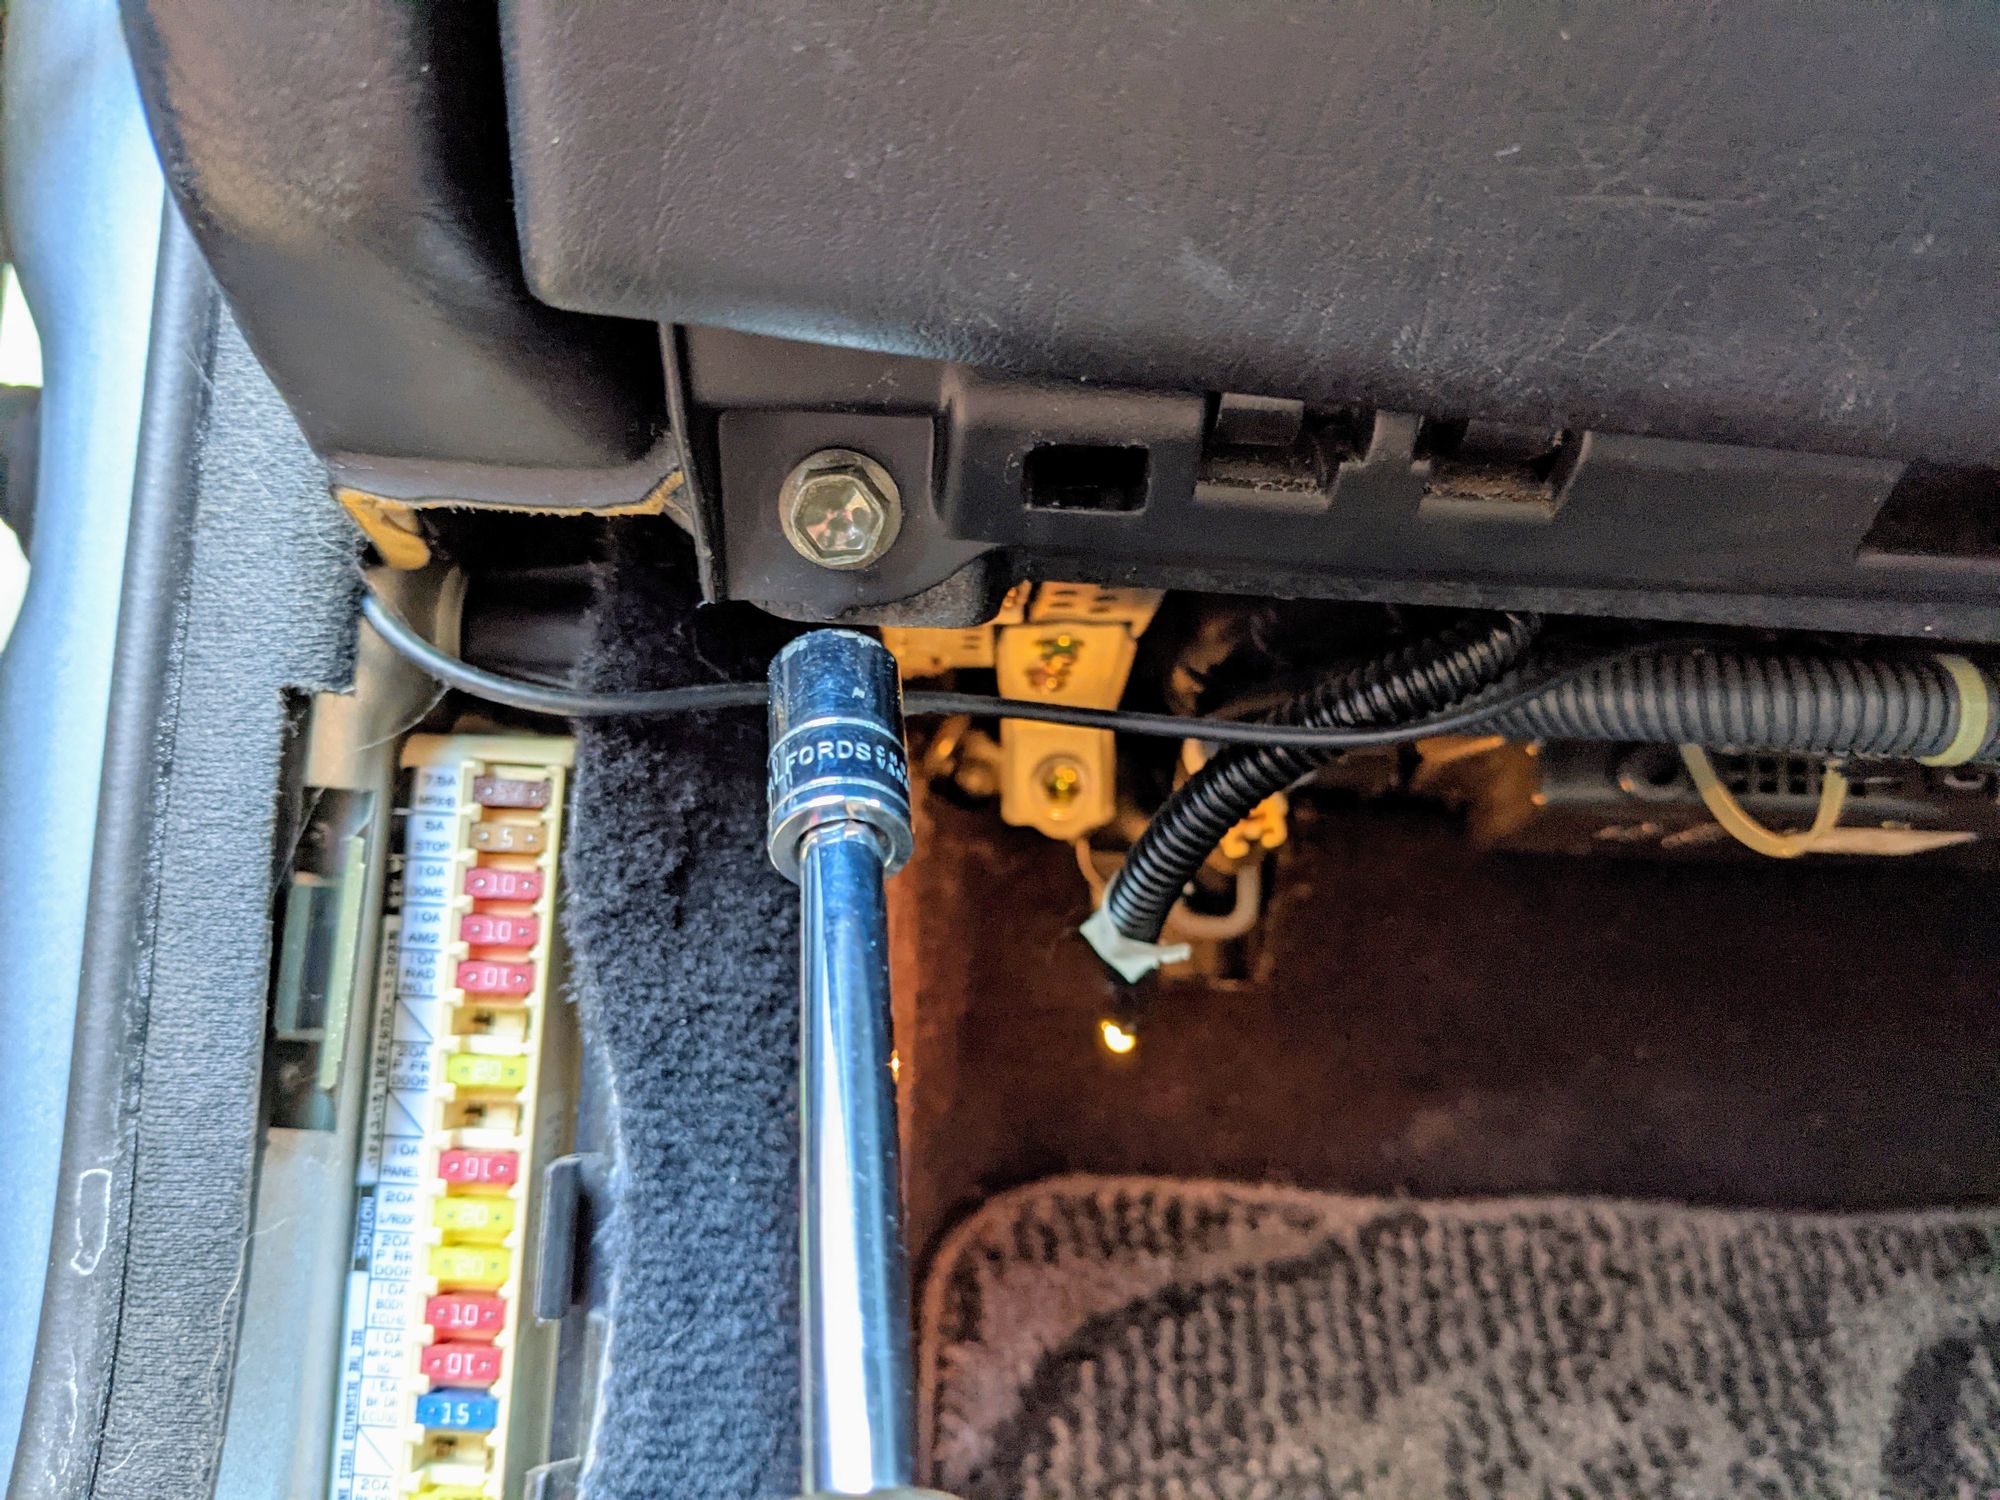
Now go ahead and remove 2 screws in each top corner of the glovebox.
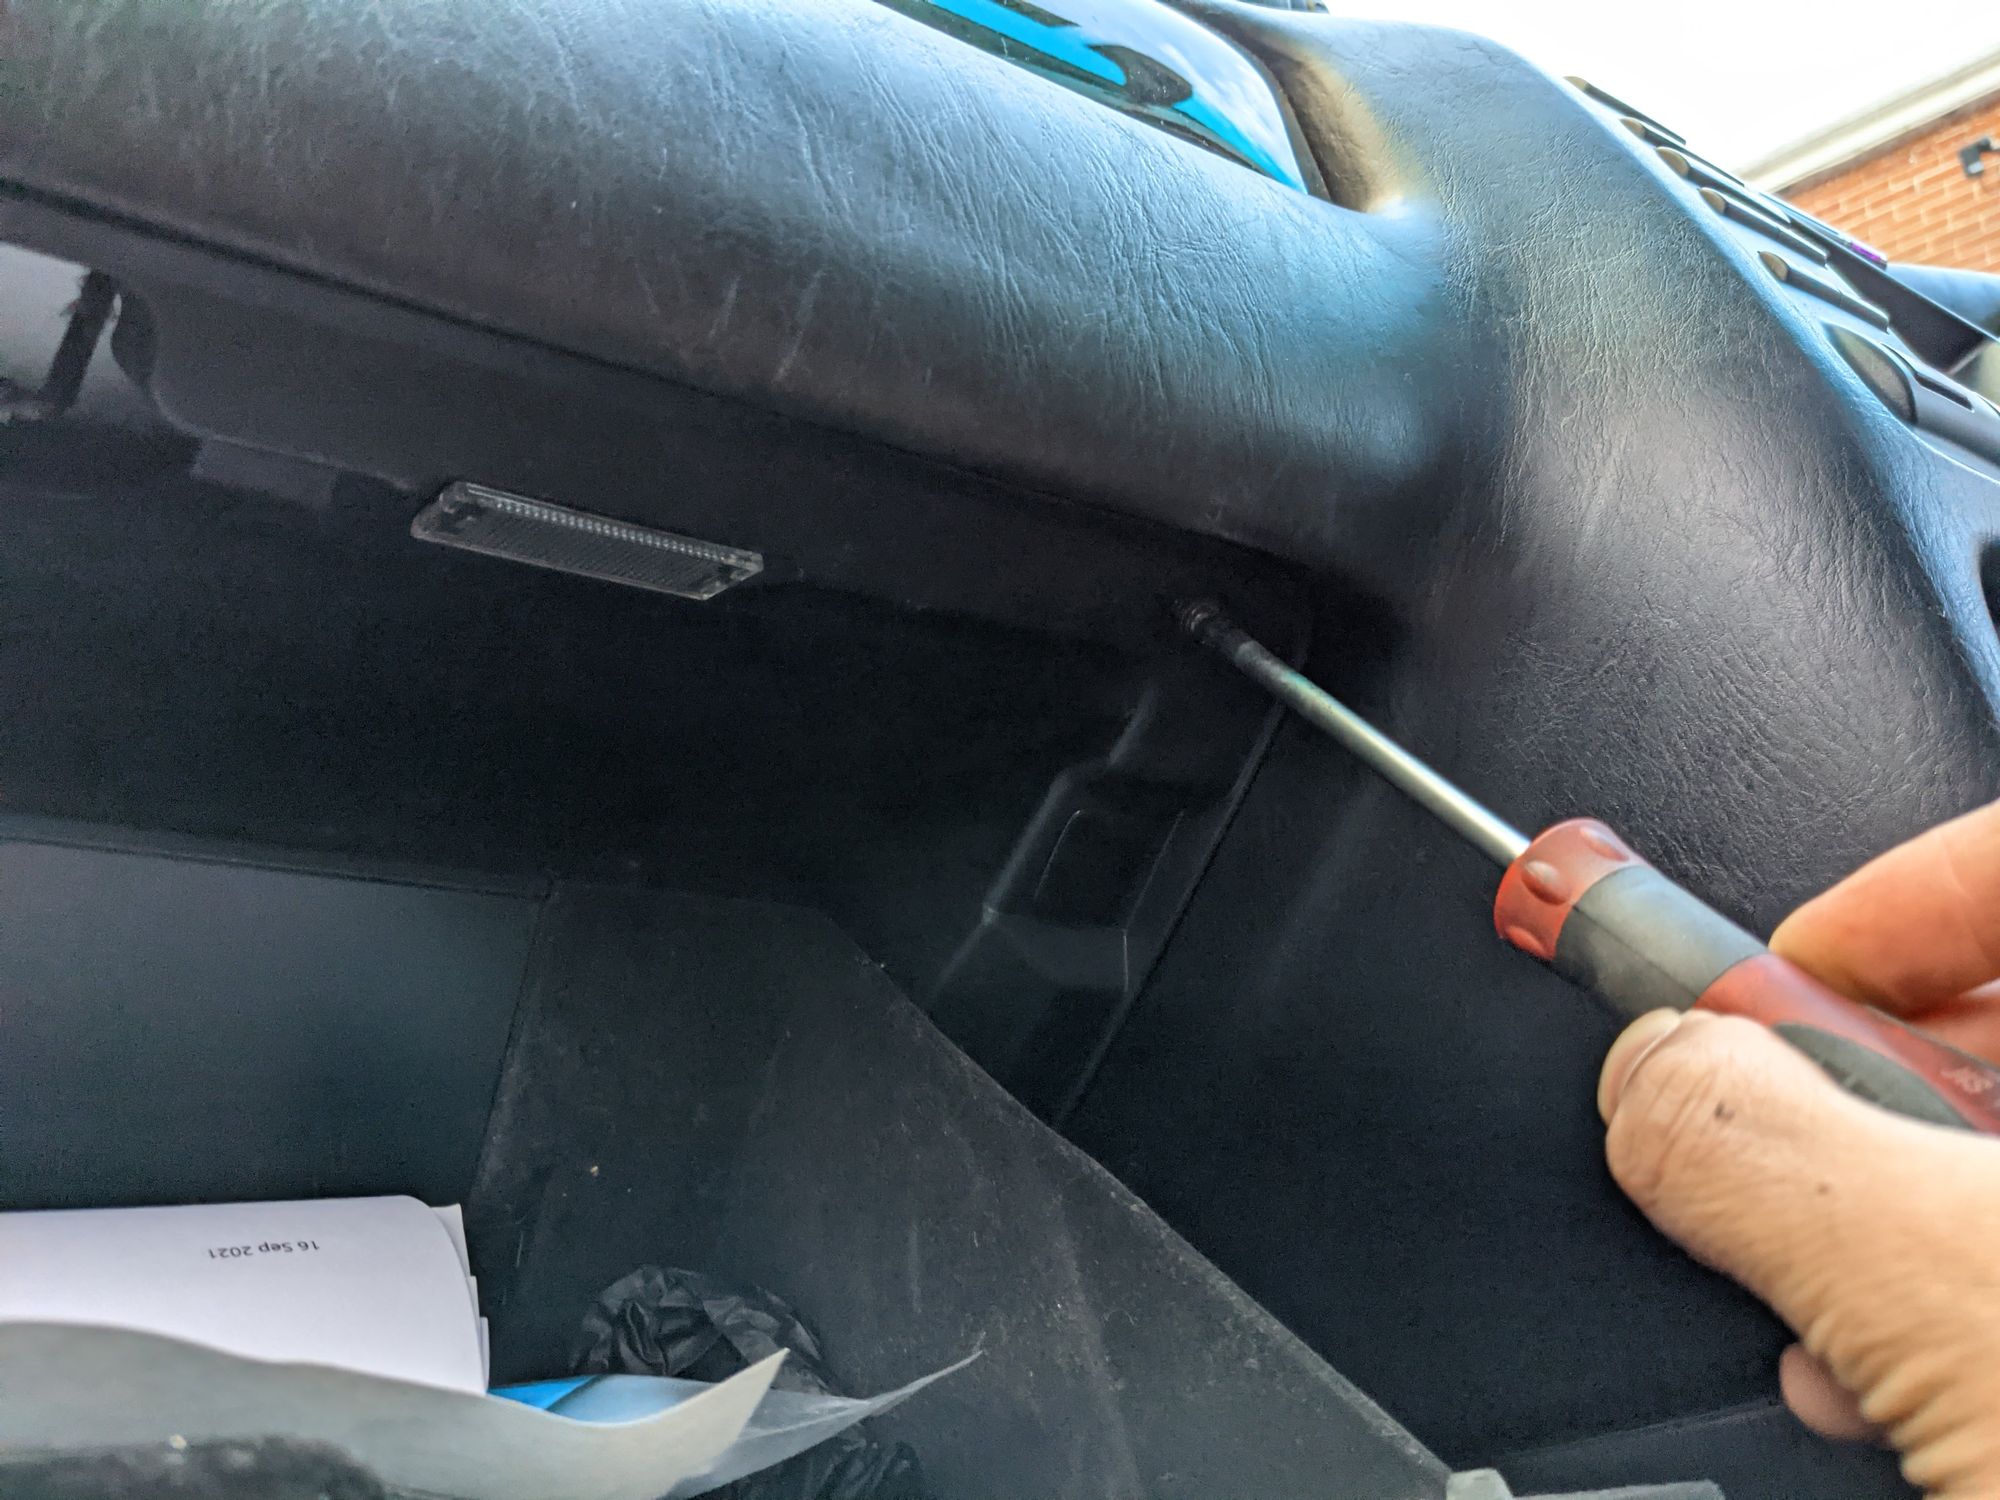
Finally, there are 2 x M10 hex screws to remove in the lower corners of the glovebox.
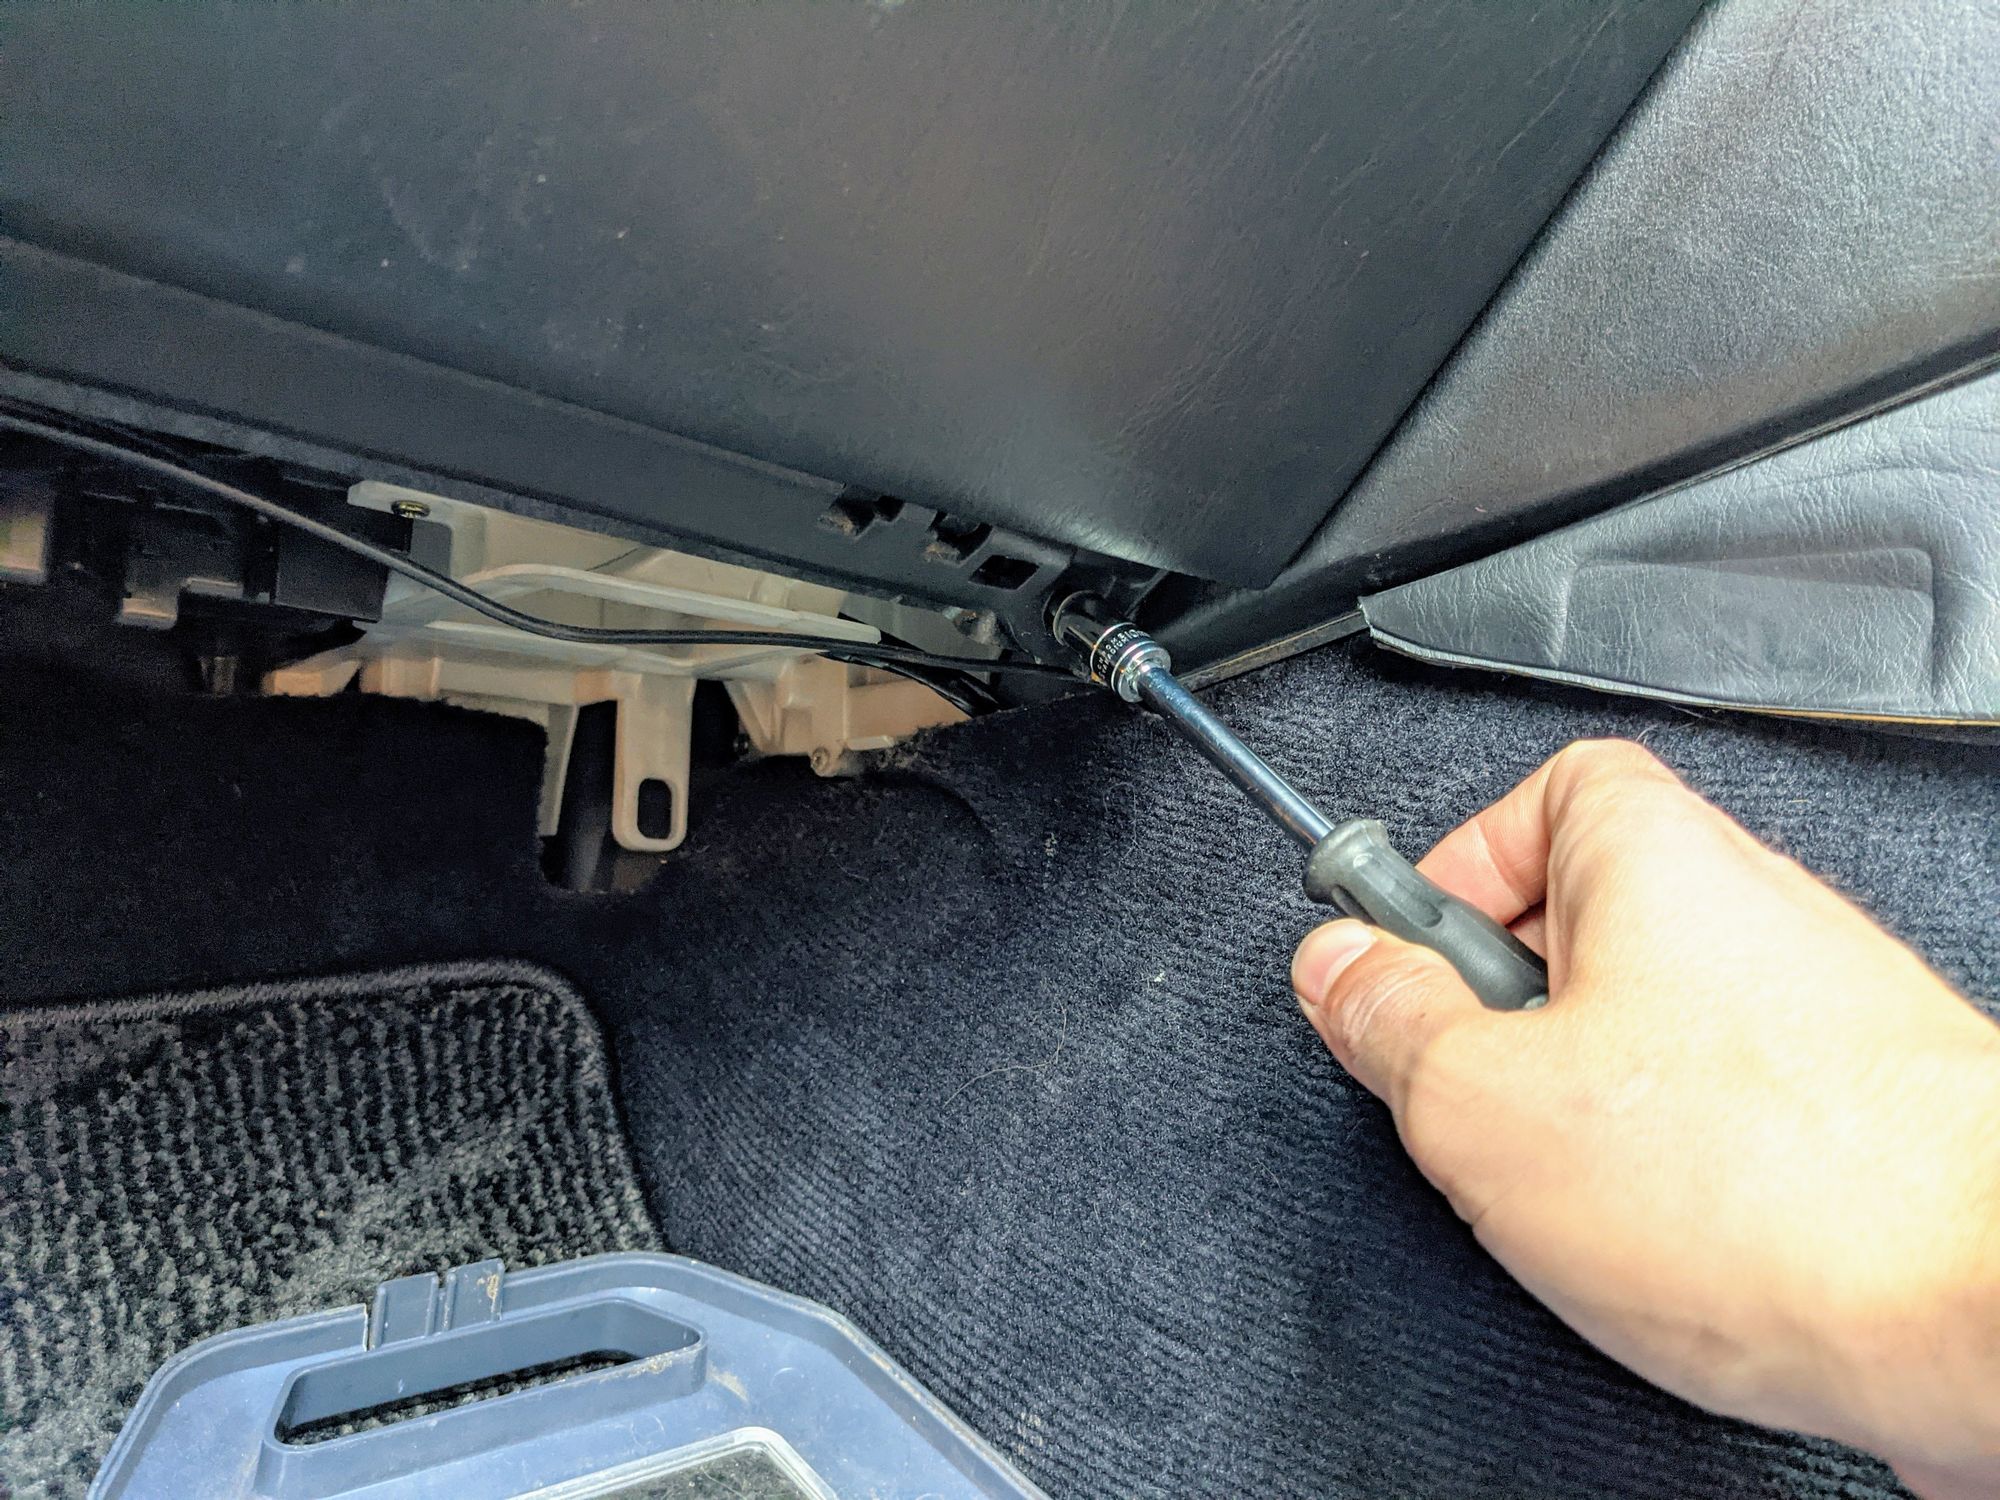
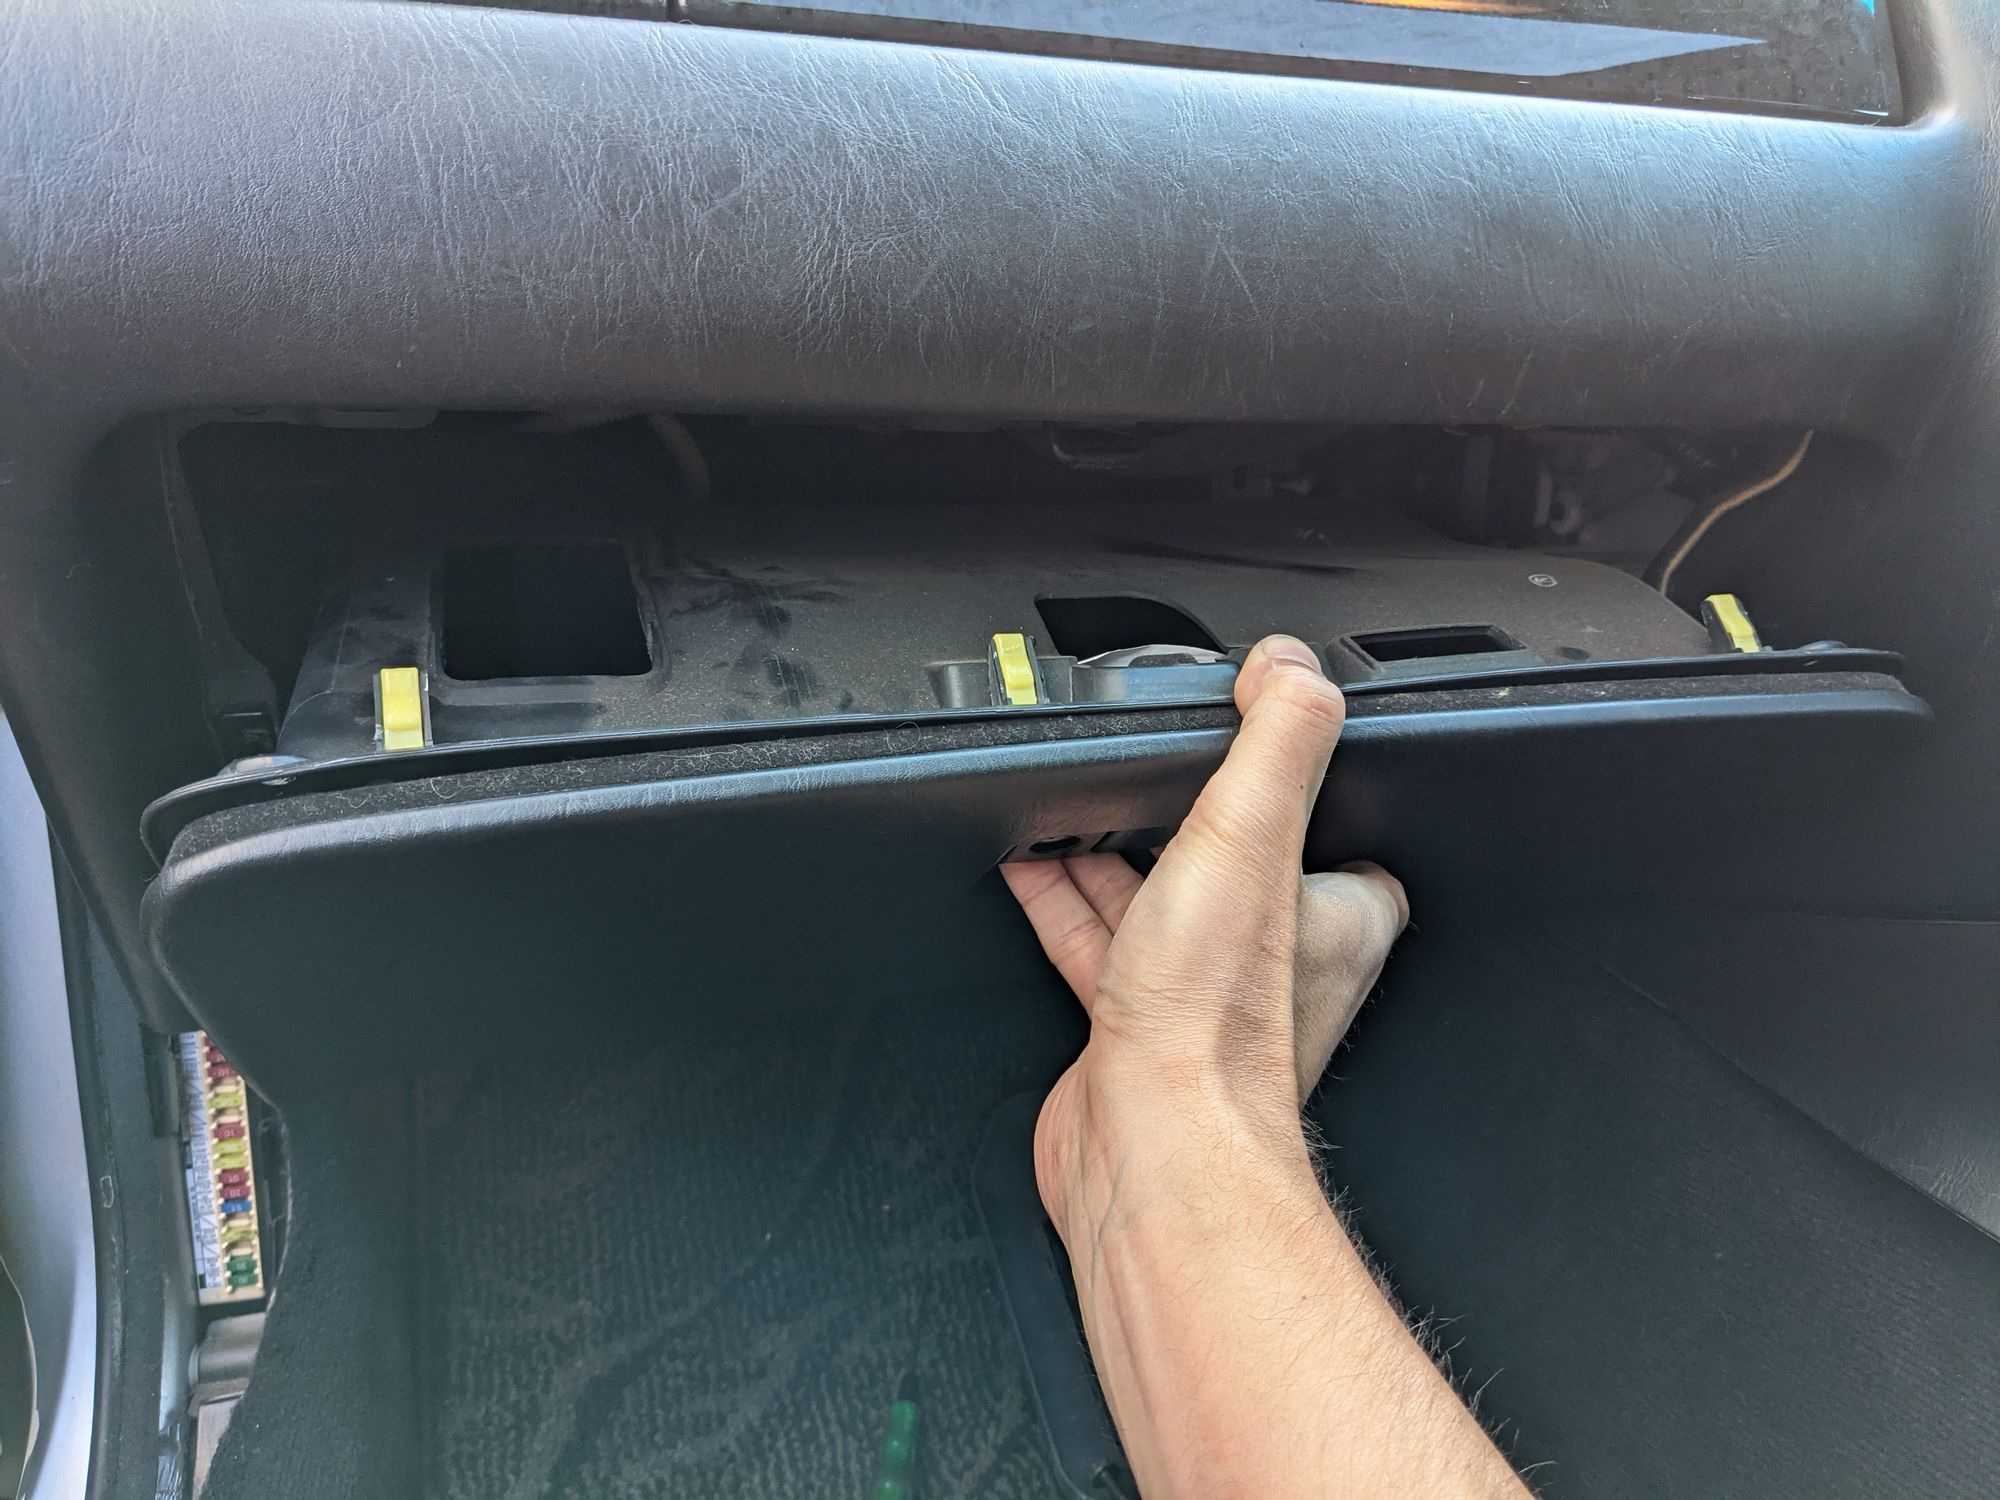
The glovebox assembly has 3 clips holding it in - just pull away carefully. Be sure to disconnect the cable to the glovebox interior light once you can access it.
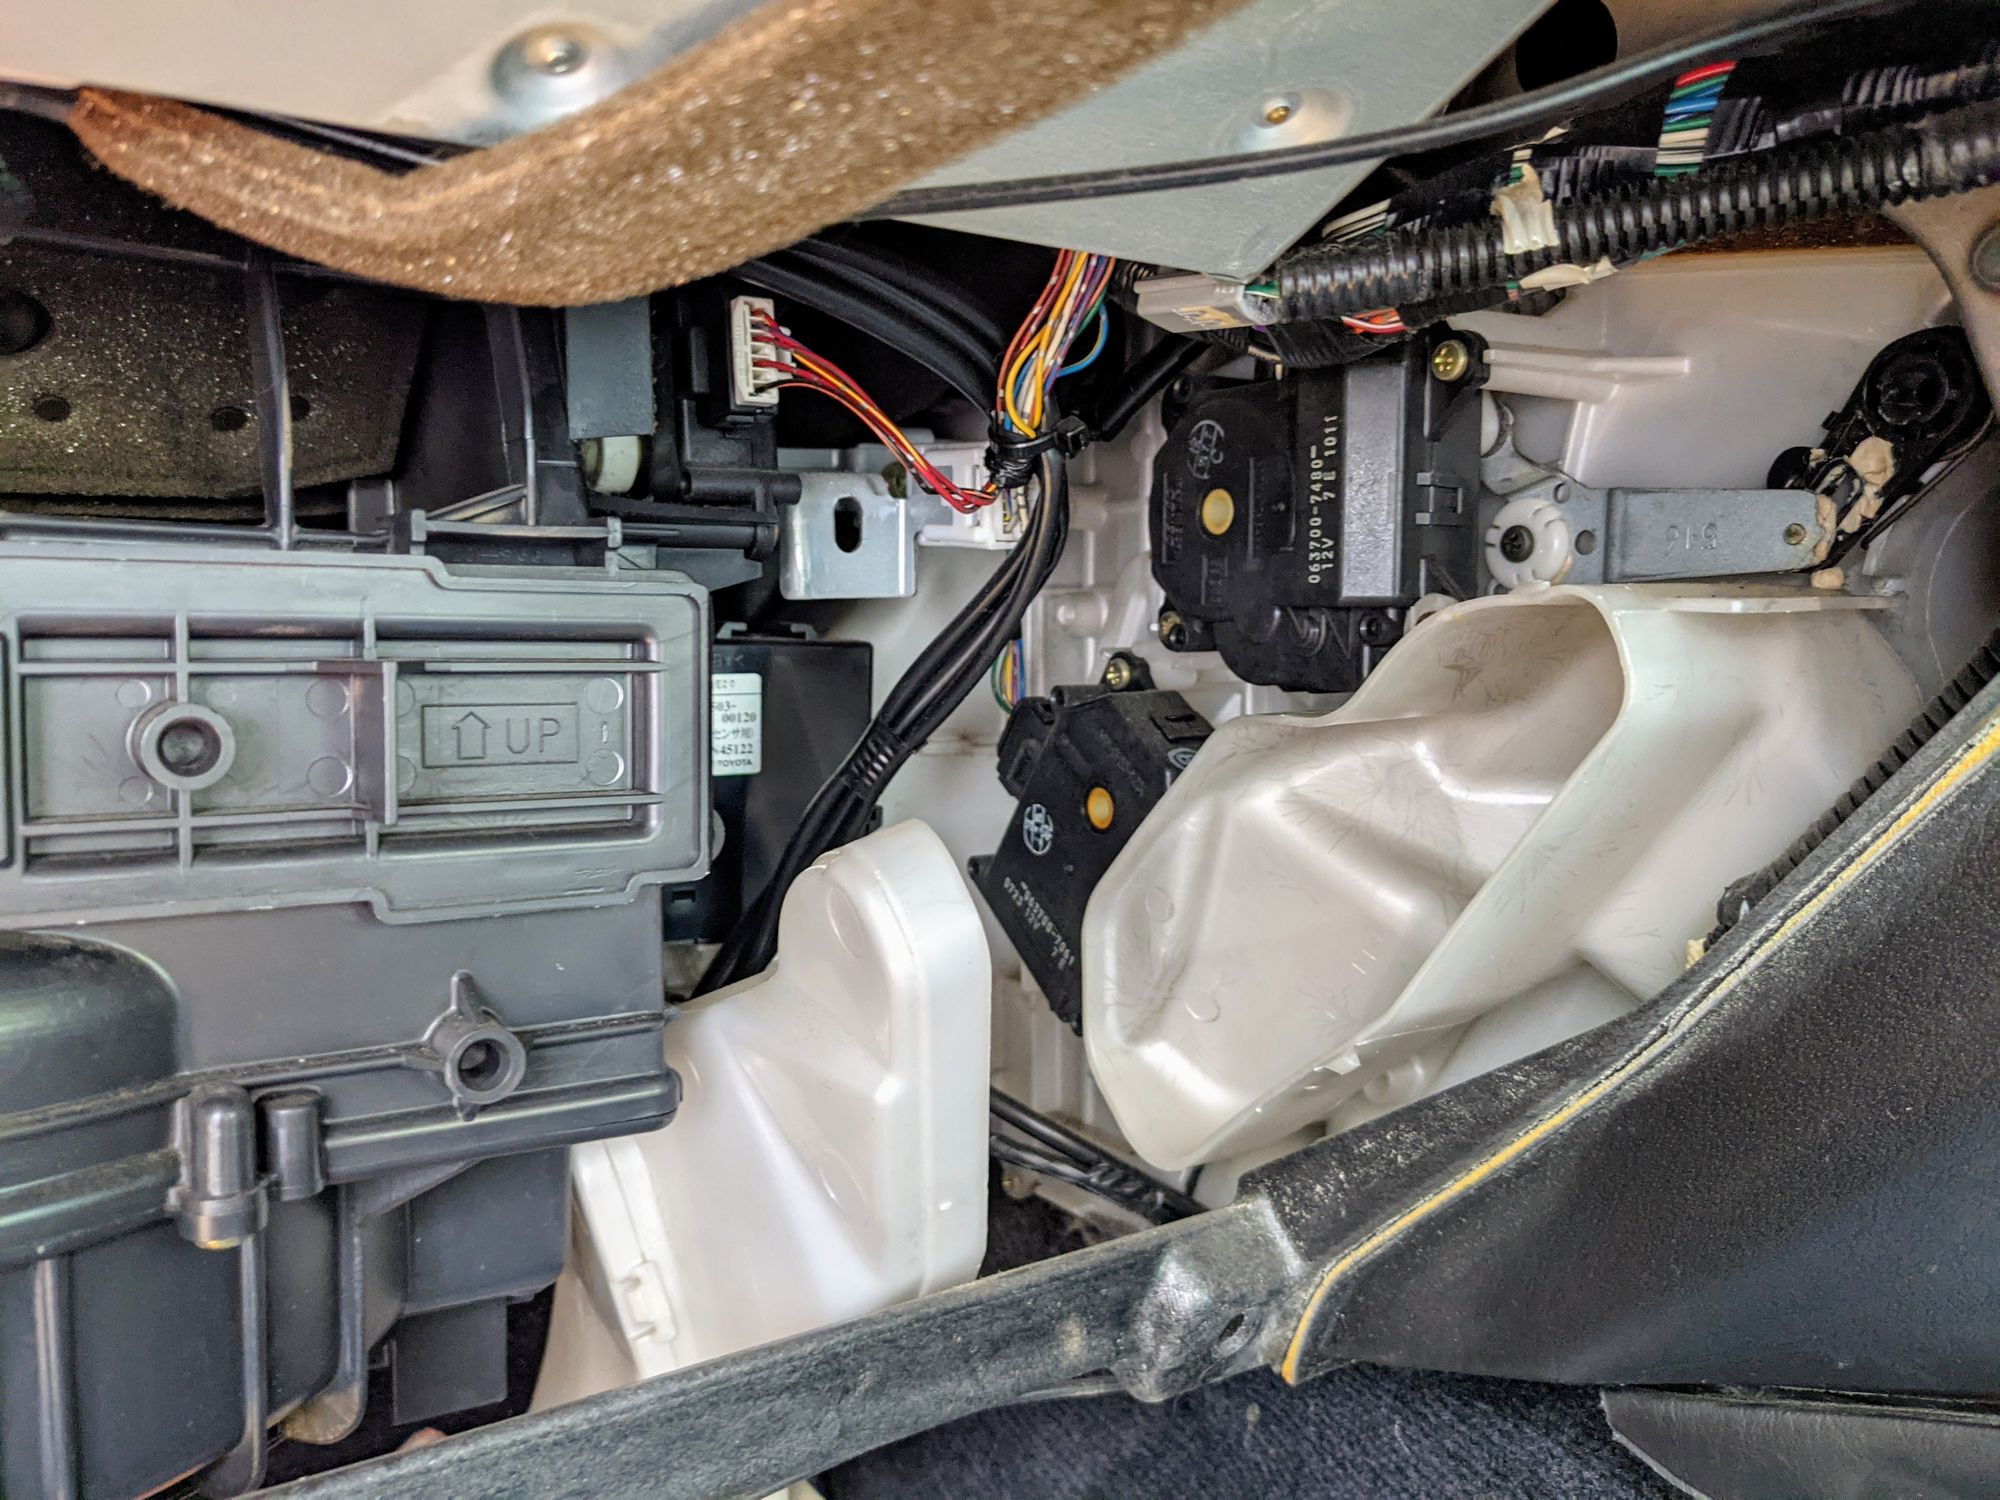
Improve Access to the Motors
These are the speed-select and mode-select motors (circled red):
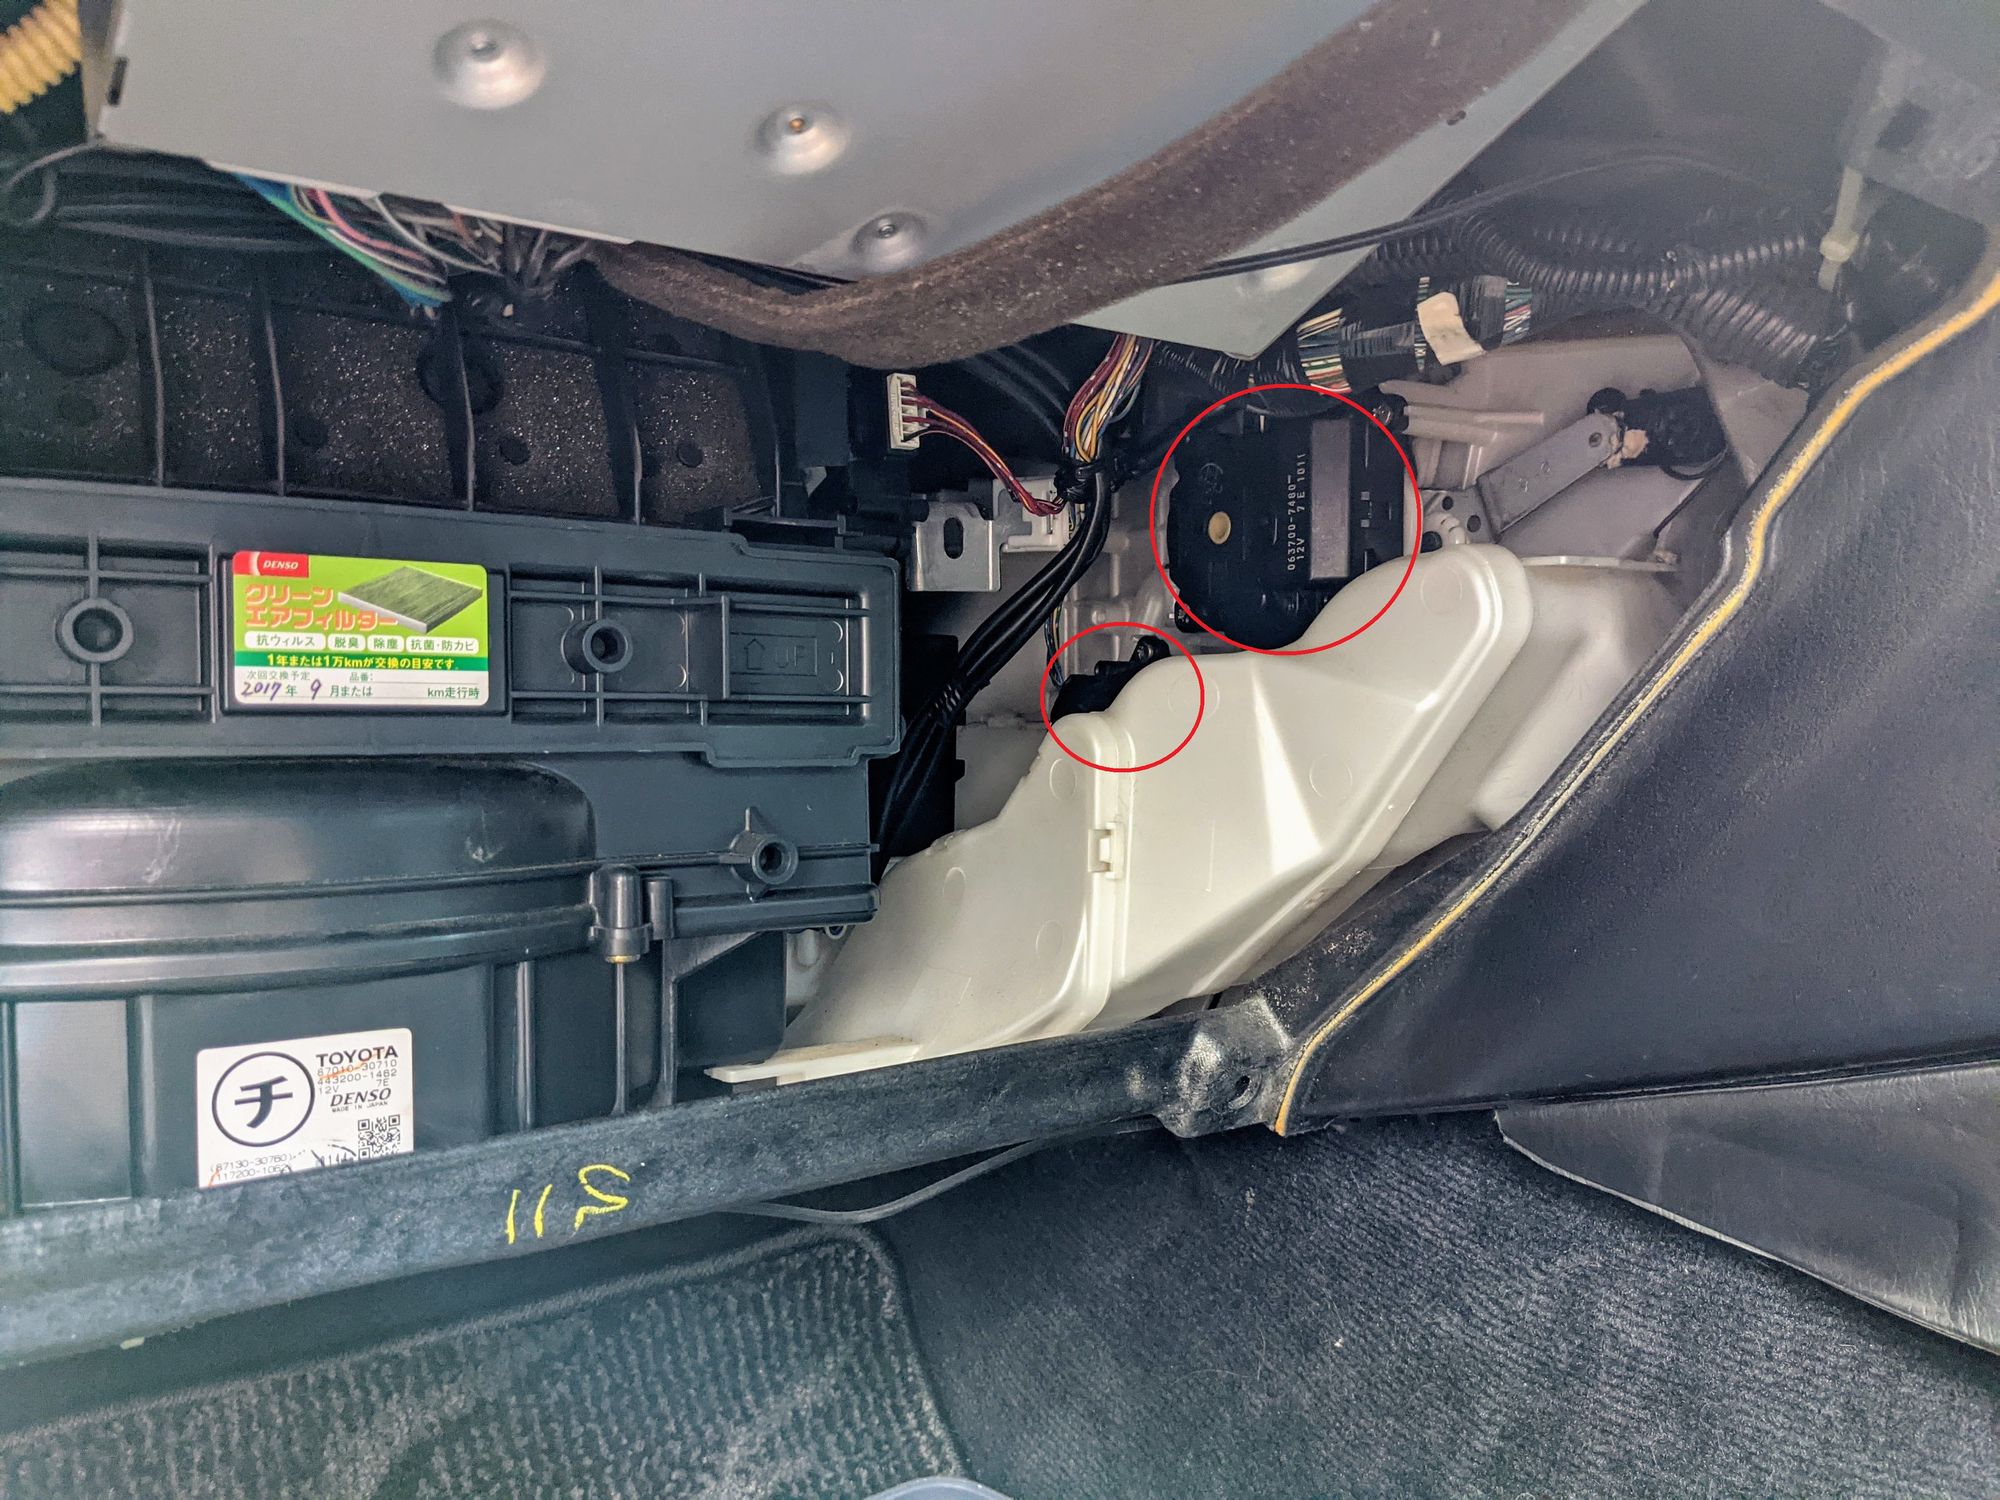
To get better access to them, remove the screw securing the the white vent assembly. This will then pull away to reveal access to all of the motor’s retaining screws.
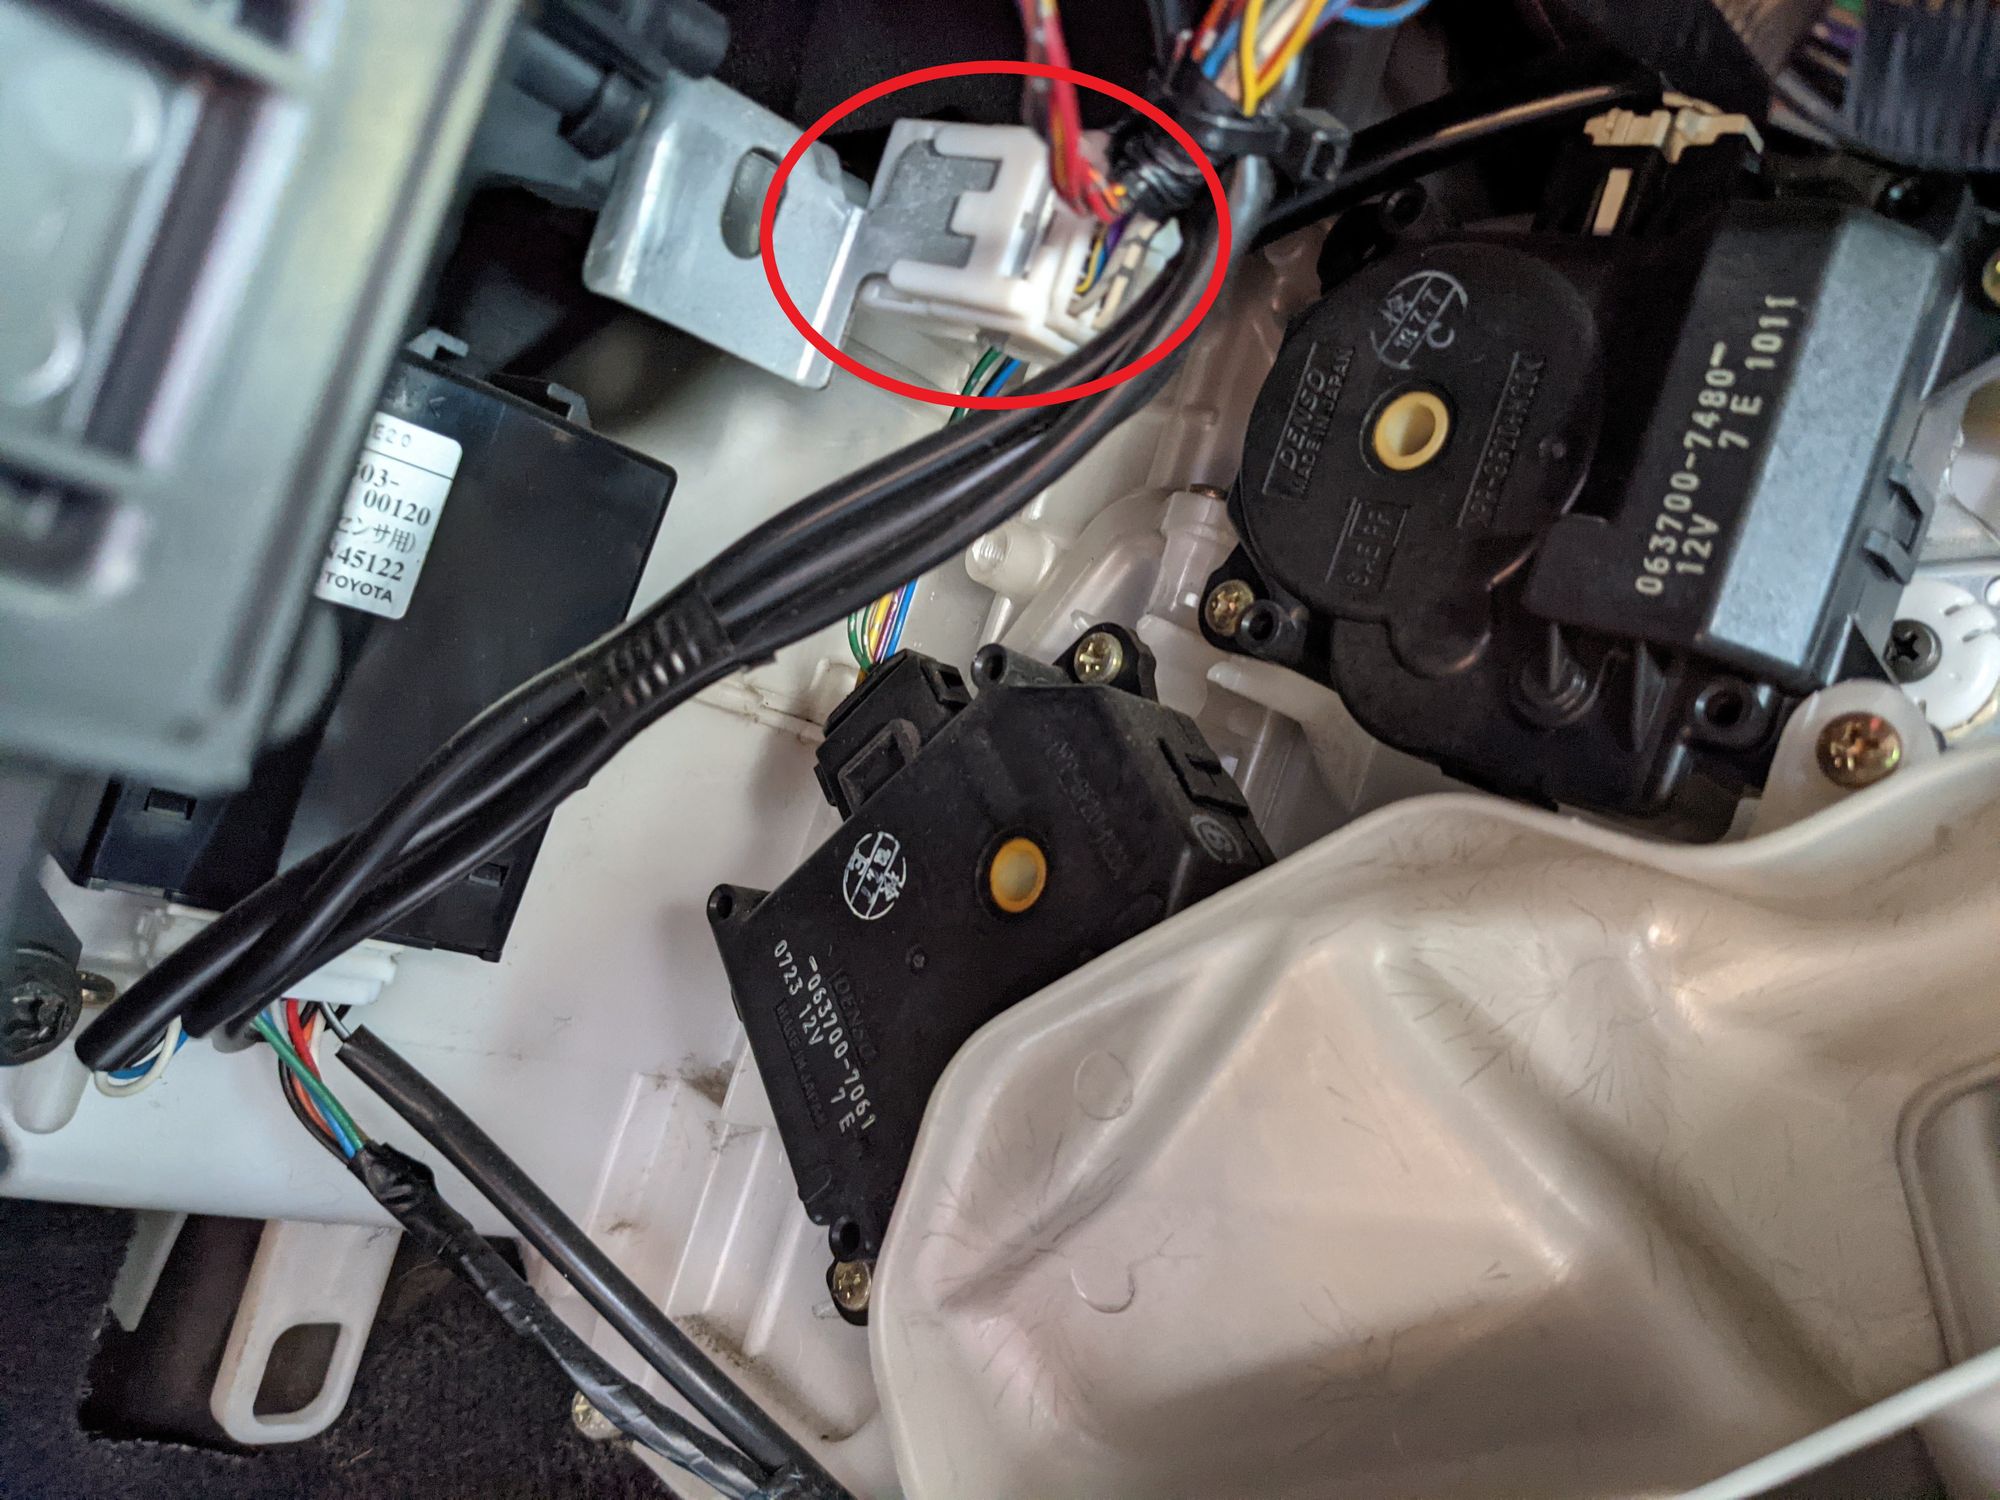
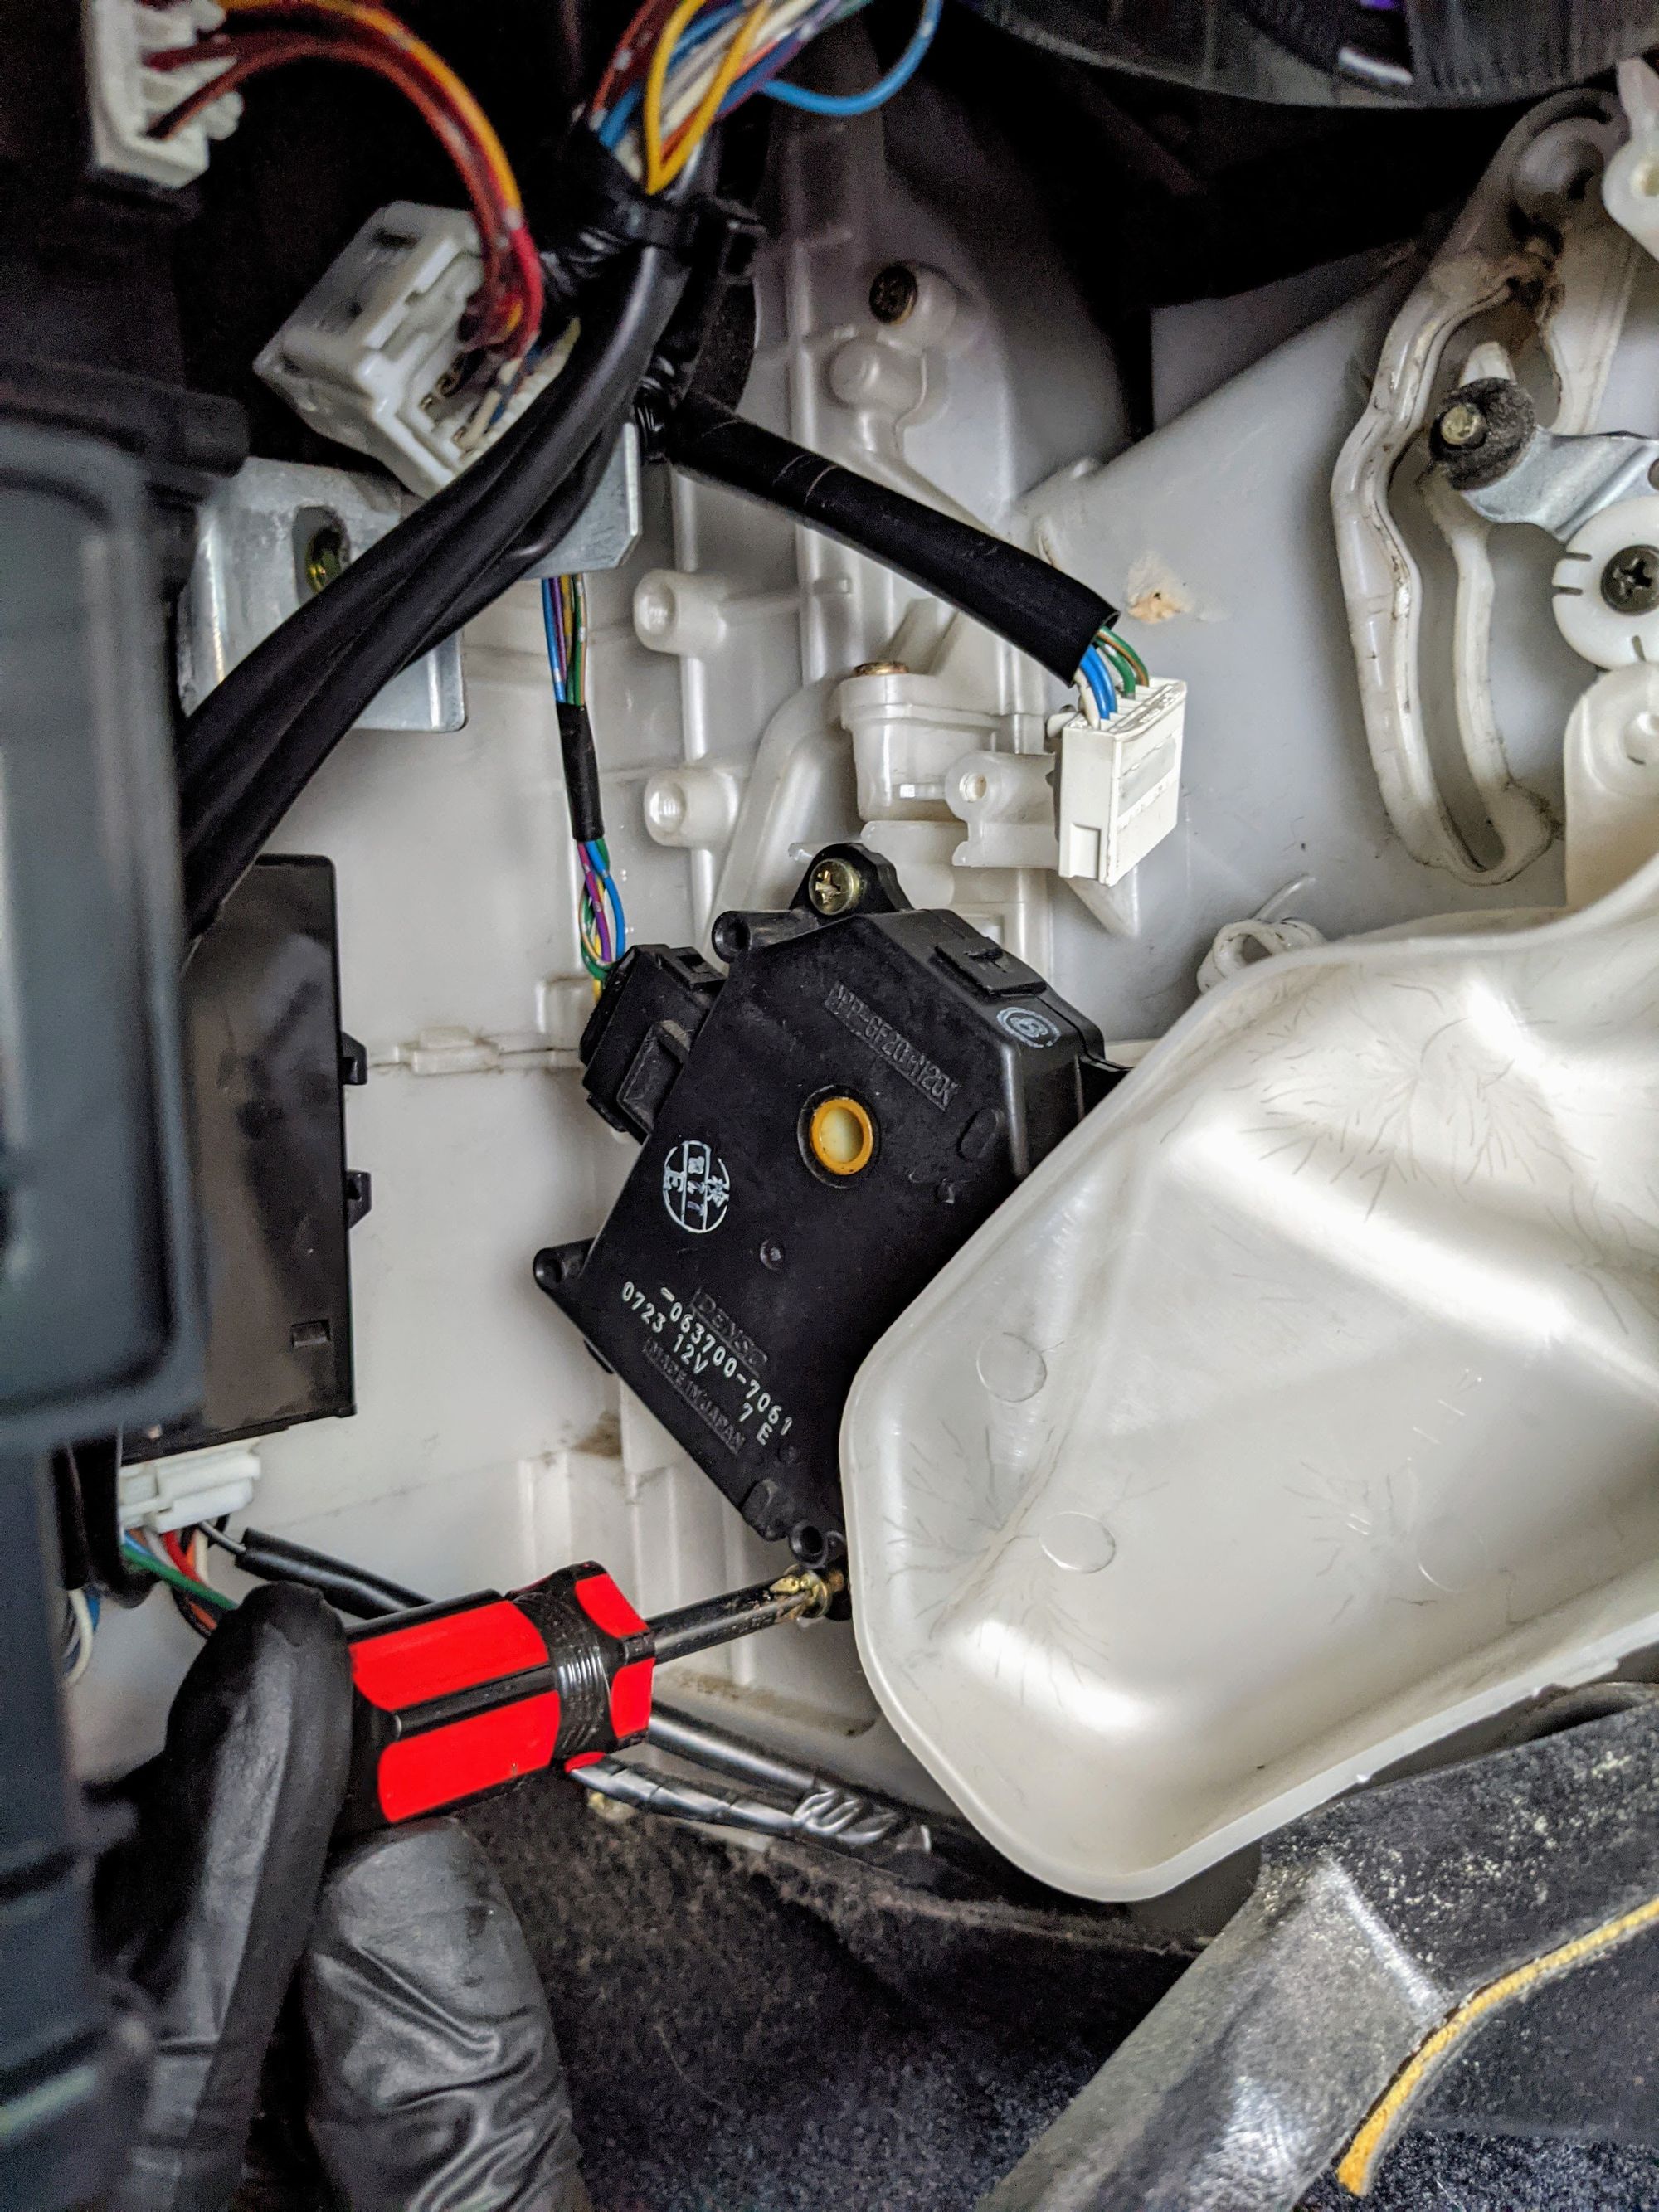
Removing the Motors
To make access easier to get at the top motor (the mode-select motor), move the cable cluster clipped onto the bracket nearby (circled red). You should now be able to get a hand onto the top motor’s connector to unplug it.
From this point, you can now unscrew both of the motors. You will need a short/stubby screwdriver to make things easier.
Repairing the Motors
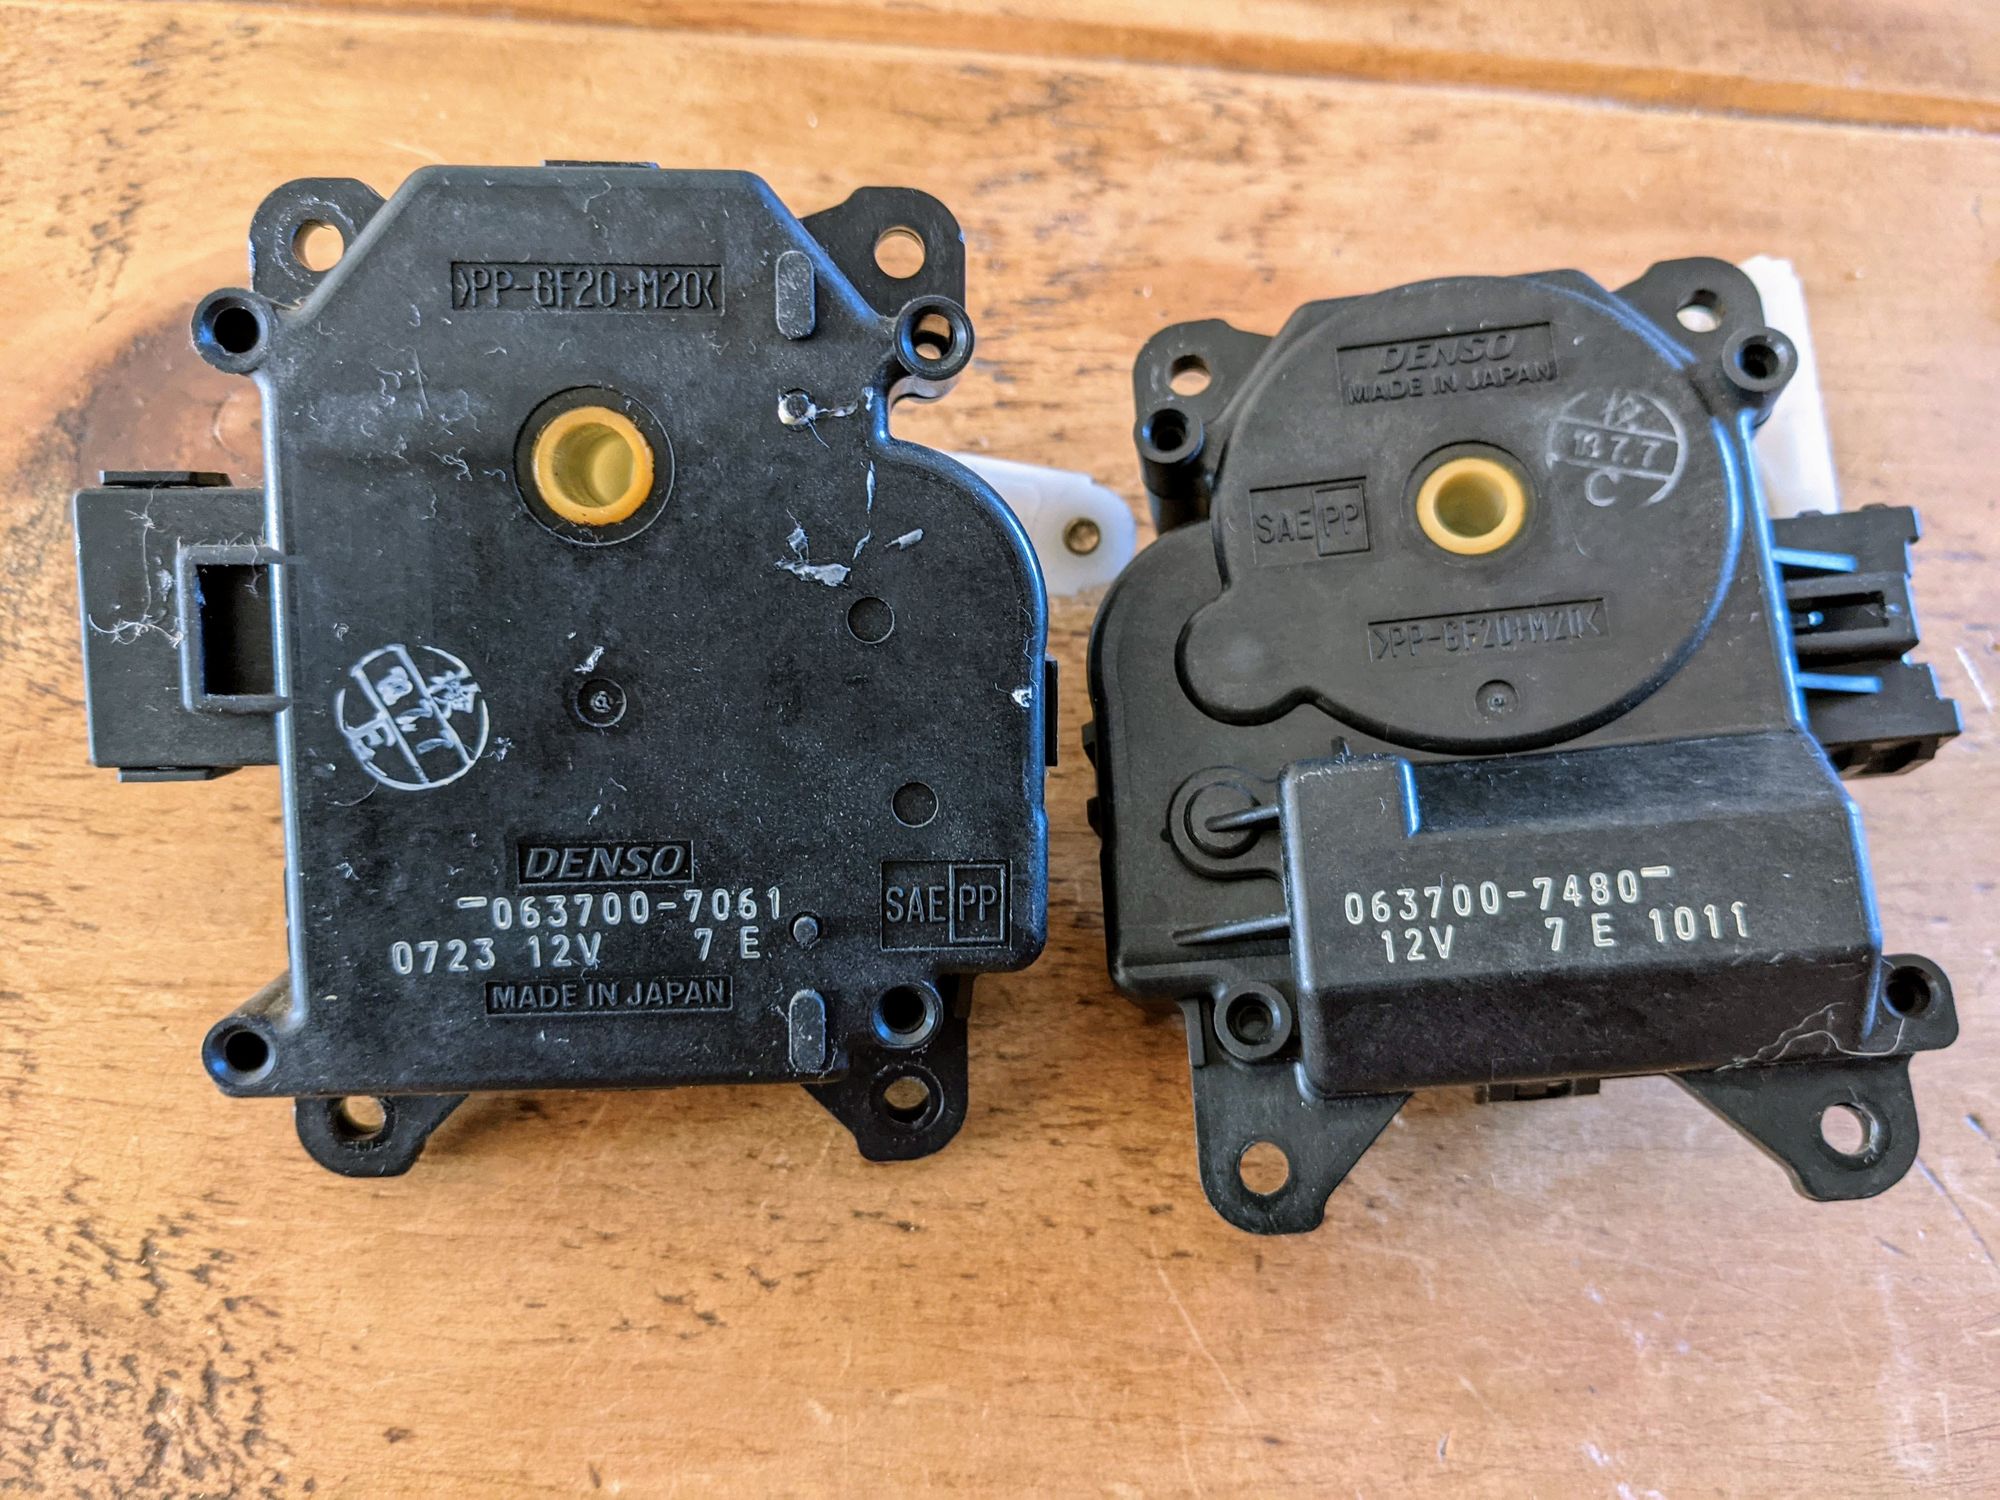
Speed-select motor on the left. Mode-select motor on the right. Part numbers printed on the motors for reference.

There’s already good references both in forums and YouTube videos on why the motors malfunction so I’ll not repeat it - take a look at the references section at the end of this guide for more detail.
Speed-Select Motor
This motor for me was the main culprit for causing the chattering sound. The repeated back and forwards of the motor trying to align itself is the cause of the chatter. You can see the action in the following:
Speed select motor issue:
To fix, the motor casing needs to come apart but before doing this, mark the current location of the white plastic arm. Mark the casing with a pen and take photos - you’ll need these to refer to when putting it back together.
Take care with the next step - its very easy to snap the casing clips.
Using a small flat-bladed screwdriver or pry tool, go around the casing and loosen up the plastic clips located around the edge - there’s about 6 with a couple of smaller clips on the cable connector edges.
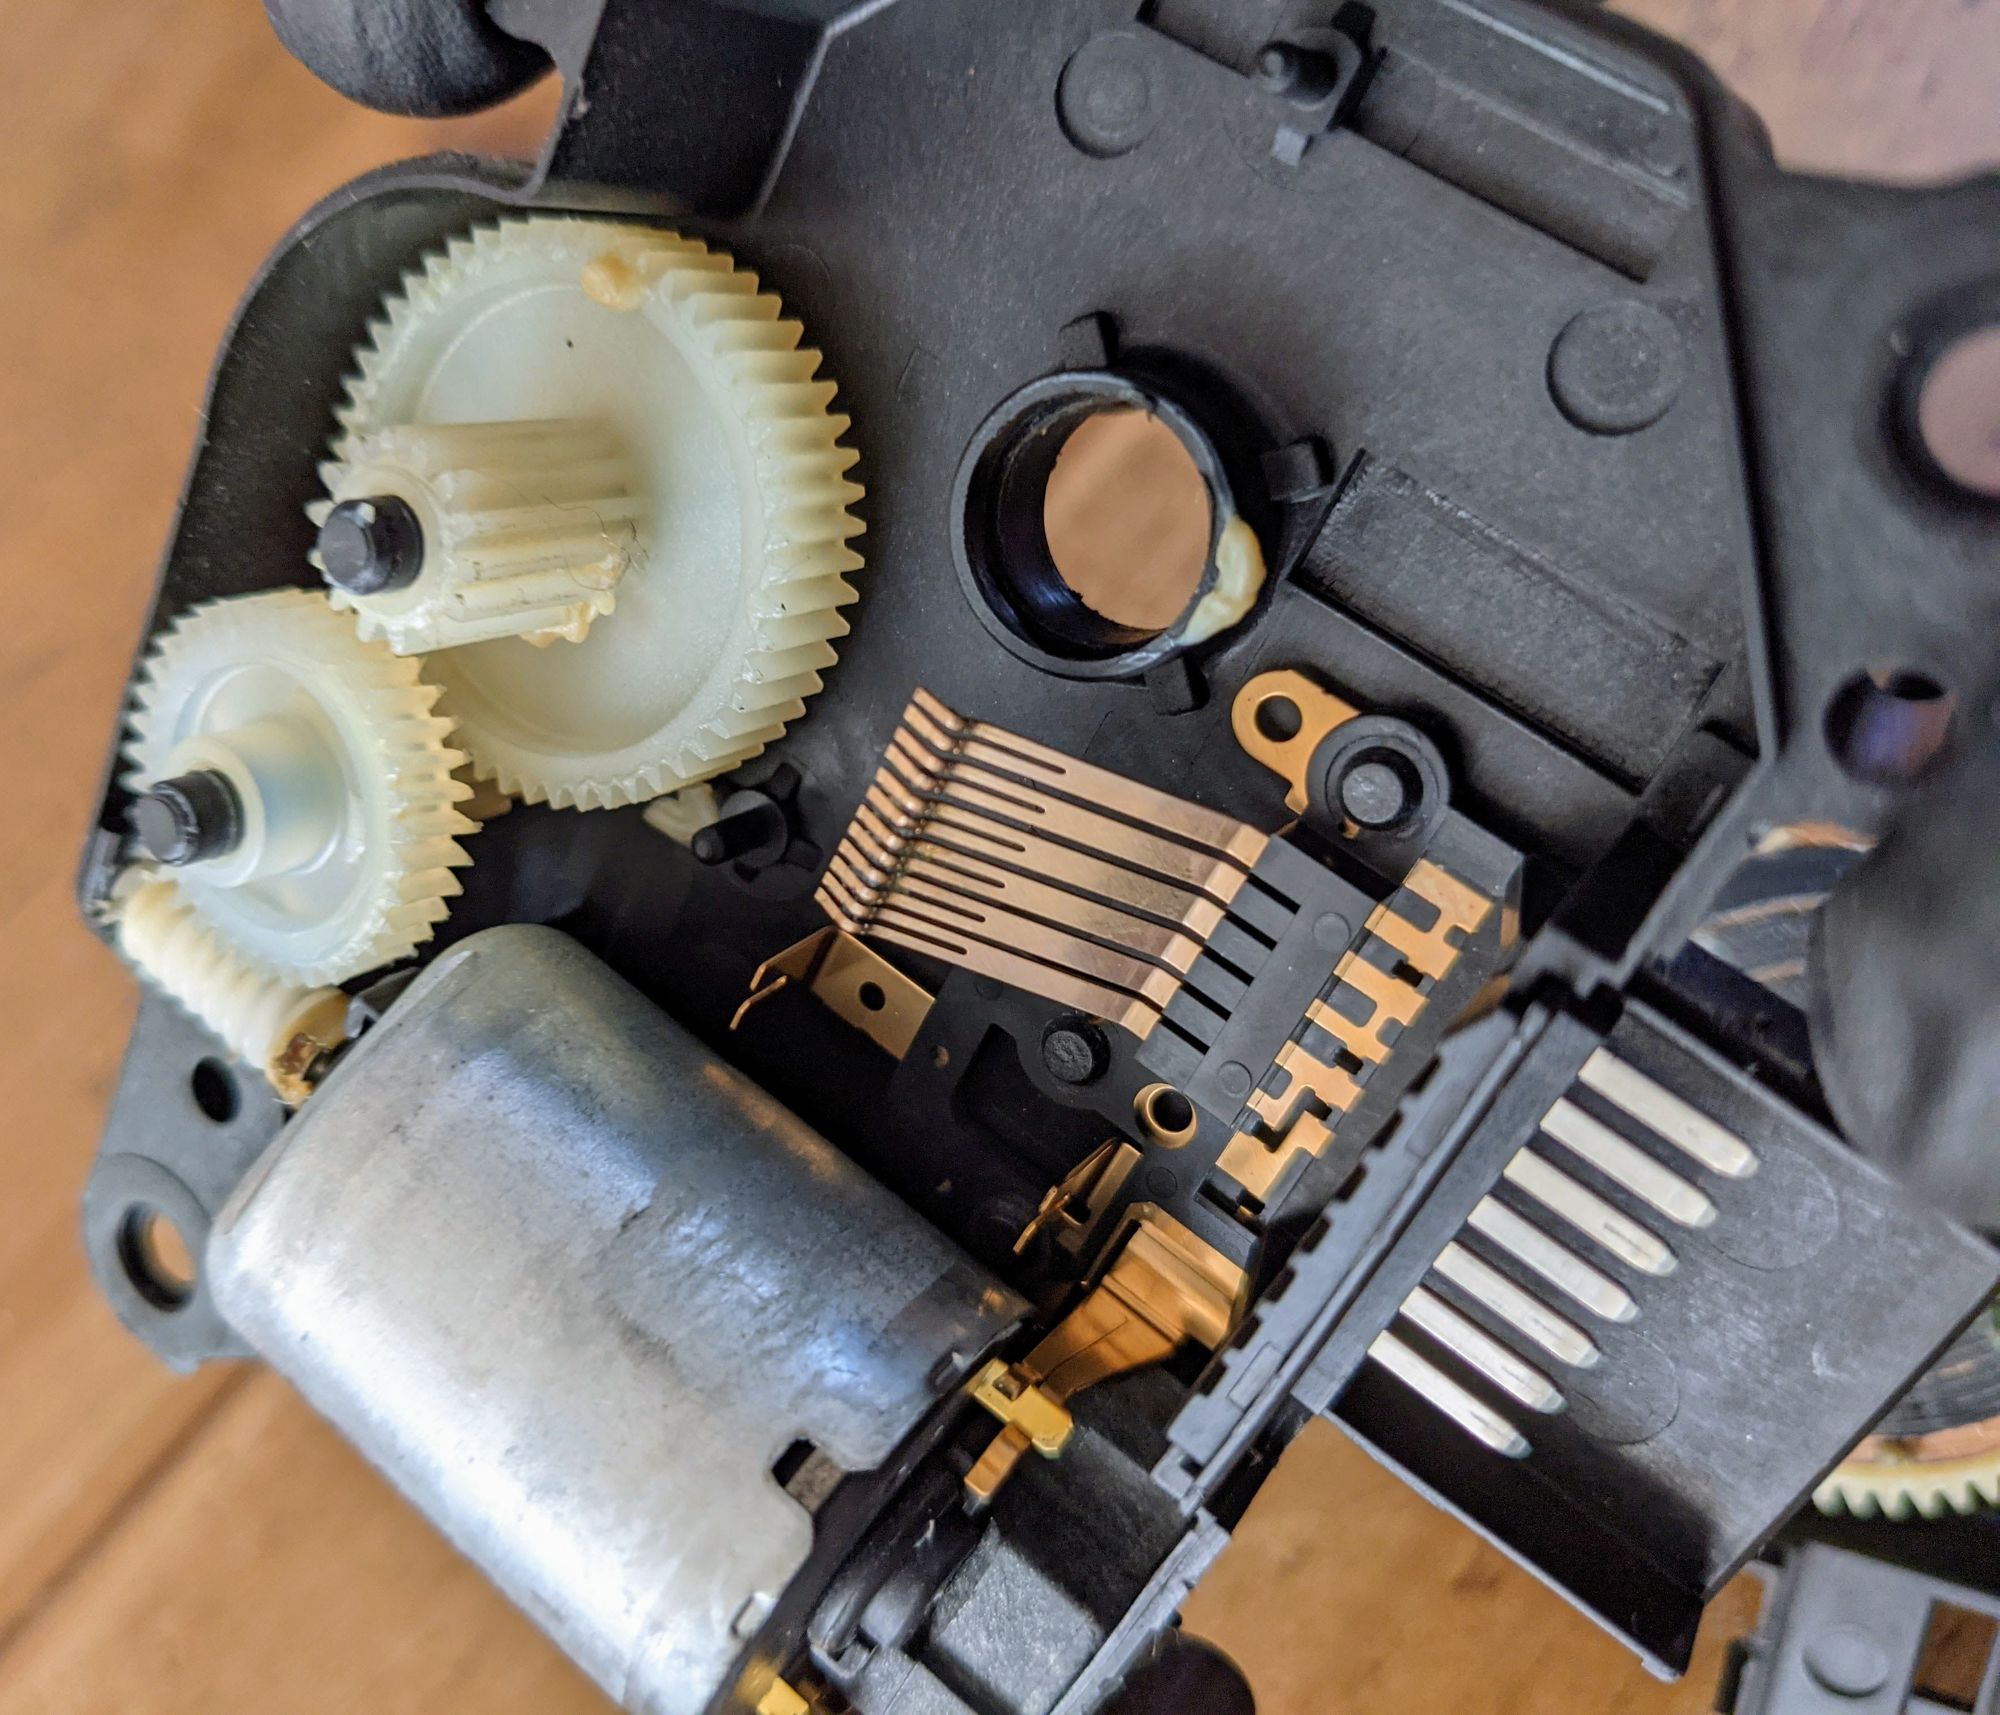
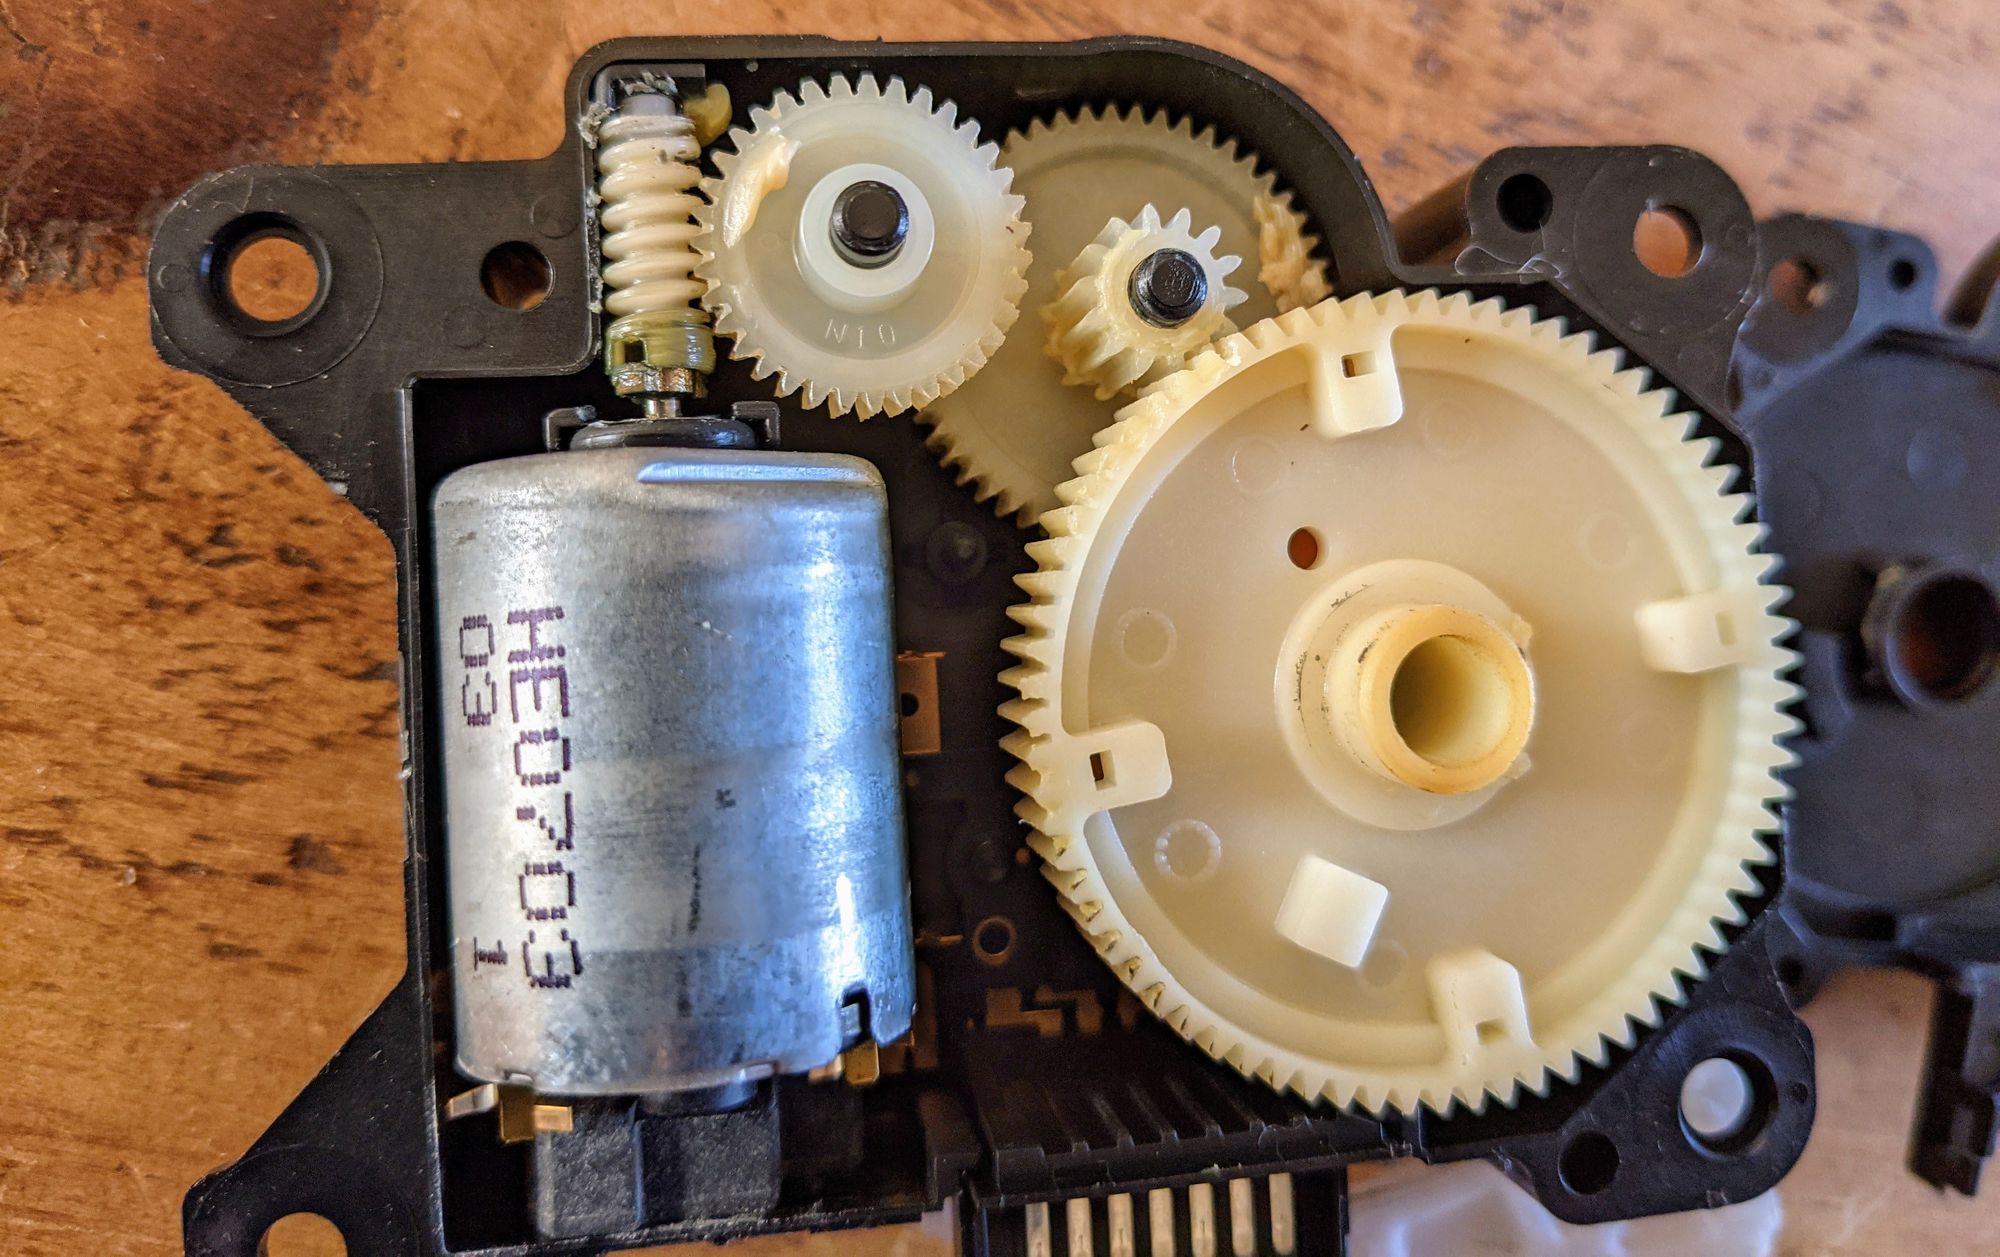
The case then splits in two.
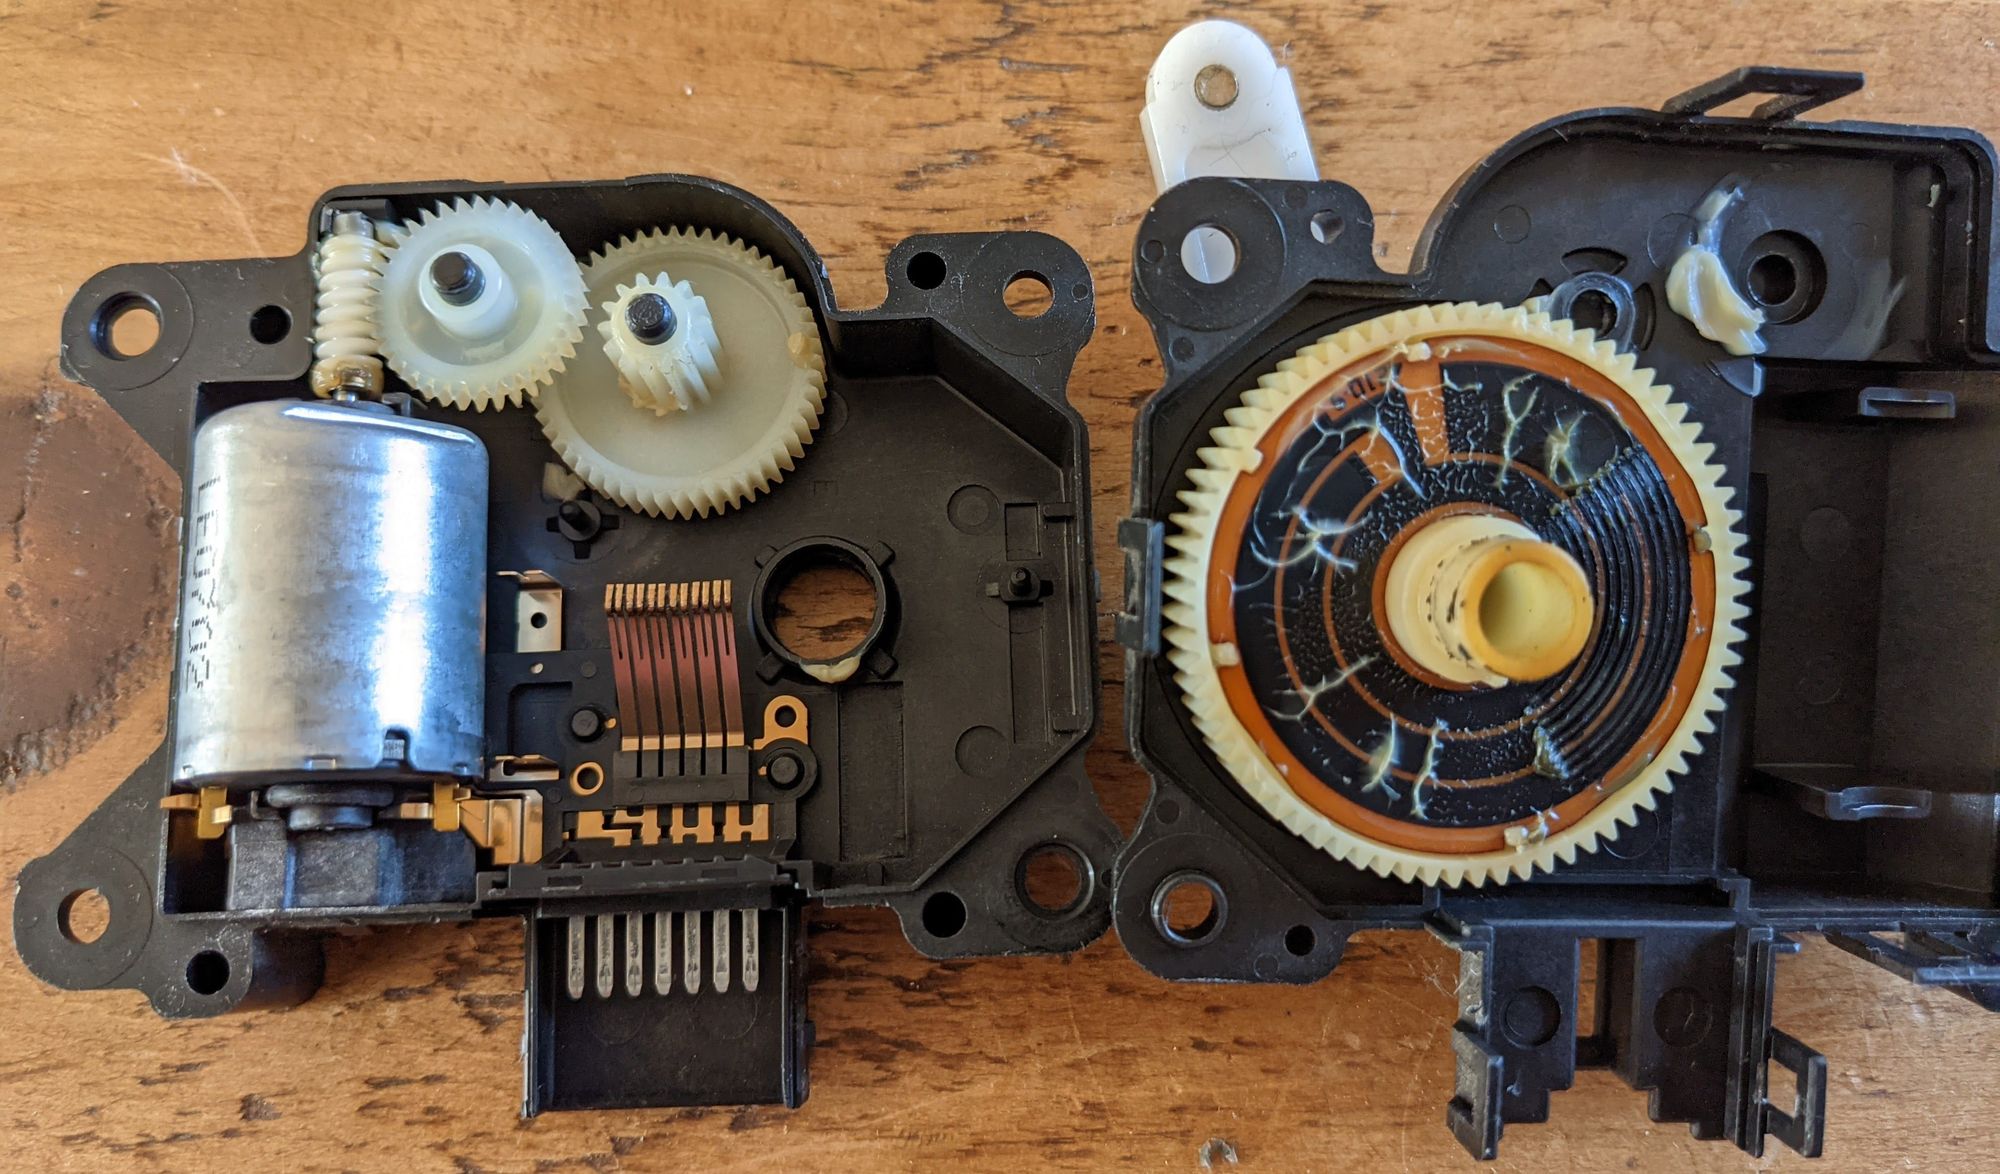
To repair the chattering motor arm, you need to clean up the dirty grease on the cog - You only need to clean the grease from the area that is grooved by the contacts from the other side of the casing (circled in red).
The chattering occurs because the grease gets contaminated with metal on the resistance material and interferes with the potentiometer signal.
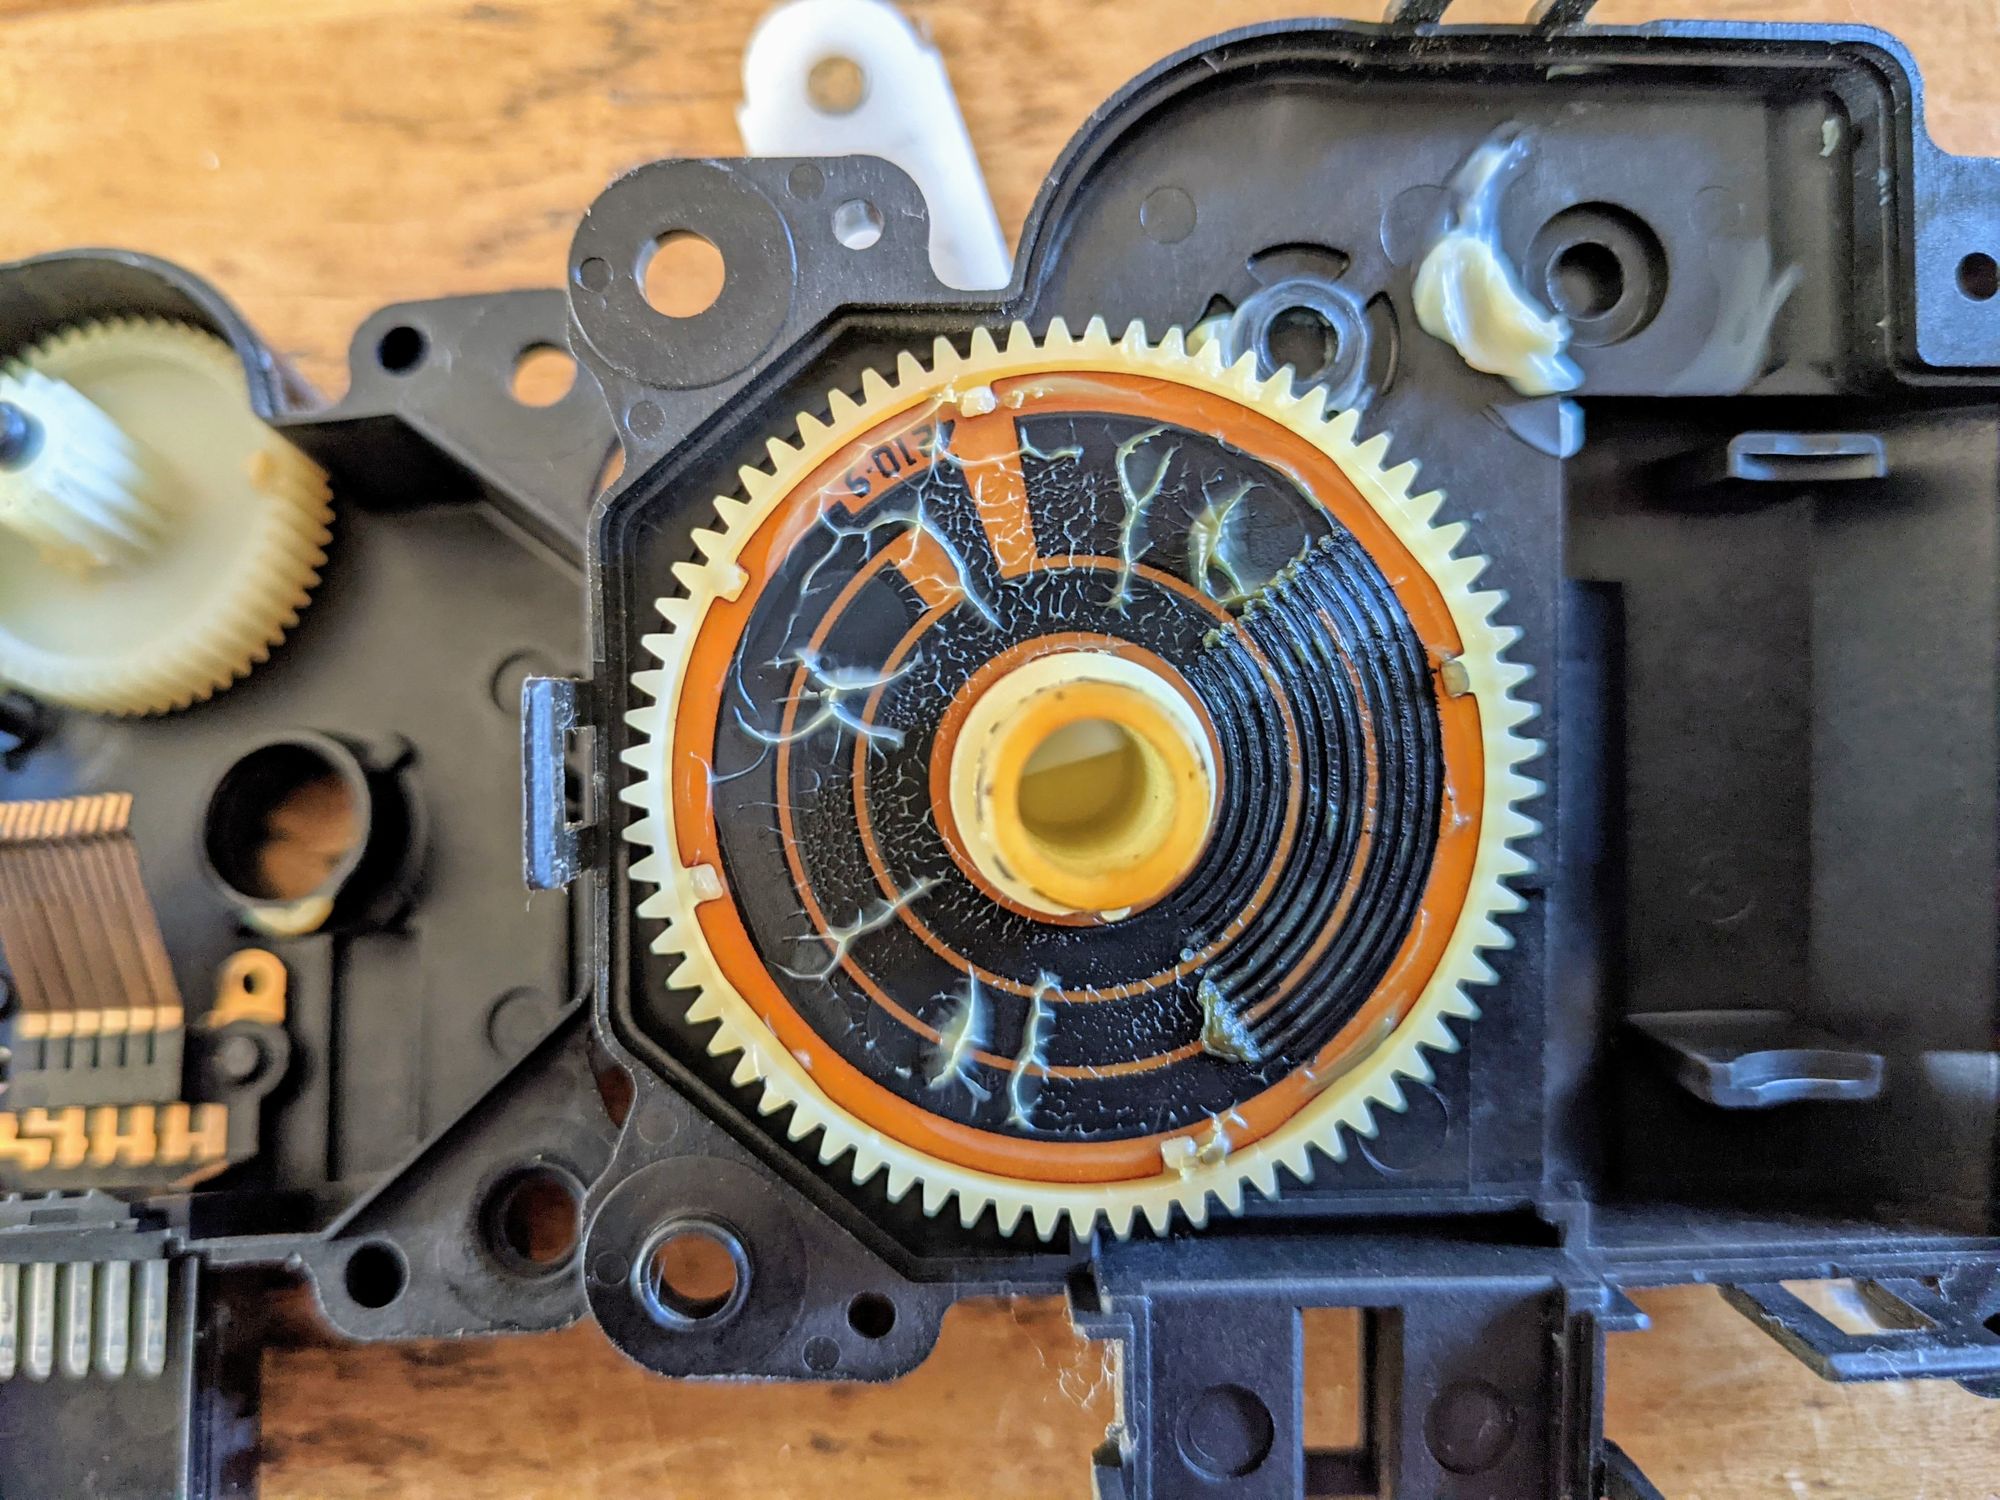
Using an alcohol cleaner or an electrical contact cleaner, clean away the contaminated grease. Best method is to dip a cotton bud in cleaner and then wipe the affected area carefully. Also do the same for the copper contacts on the other half of the casing.
Once the patch has been cleaned, using a fresh cotton bud, take some clean grease from elsewhere in the mechanism and re-coat the cleaned section.
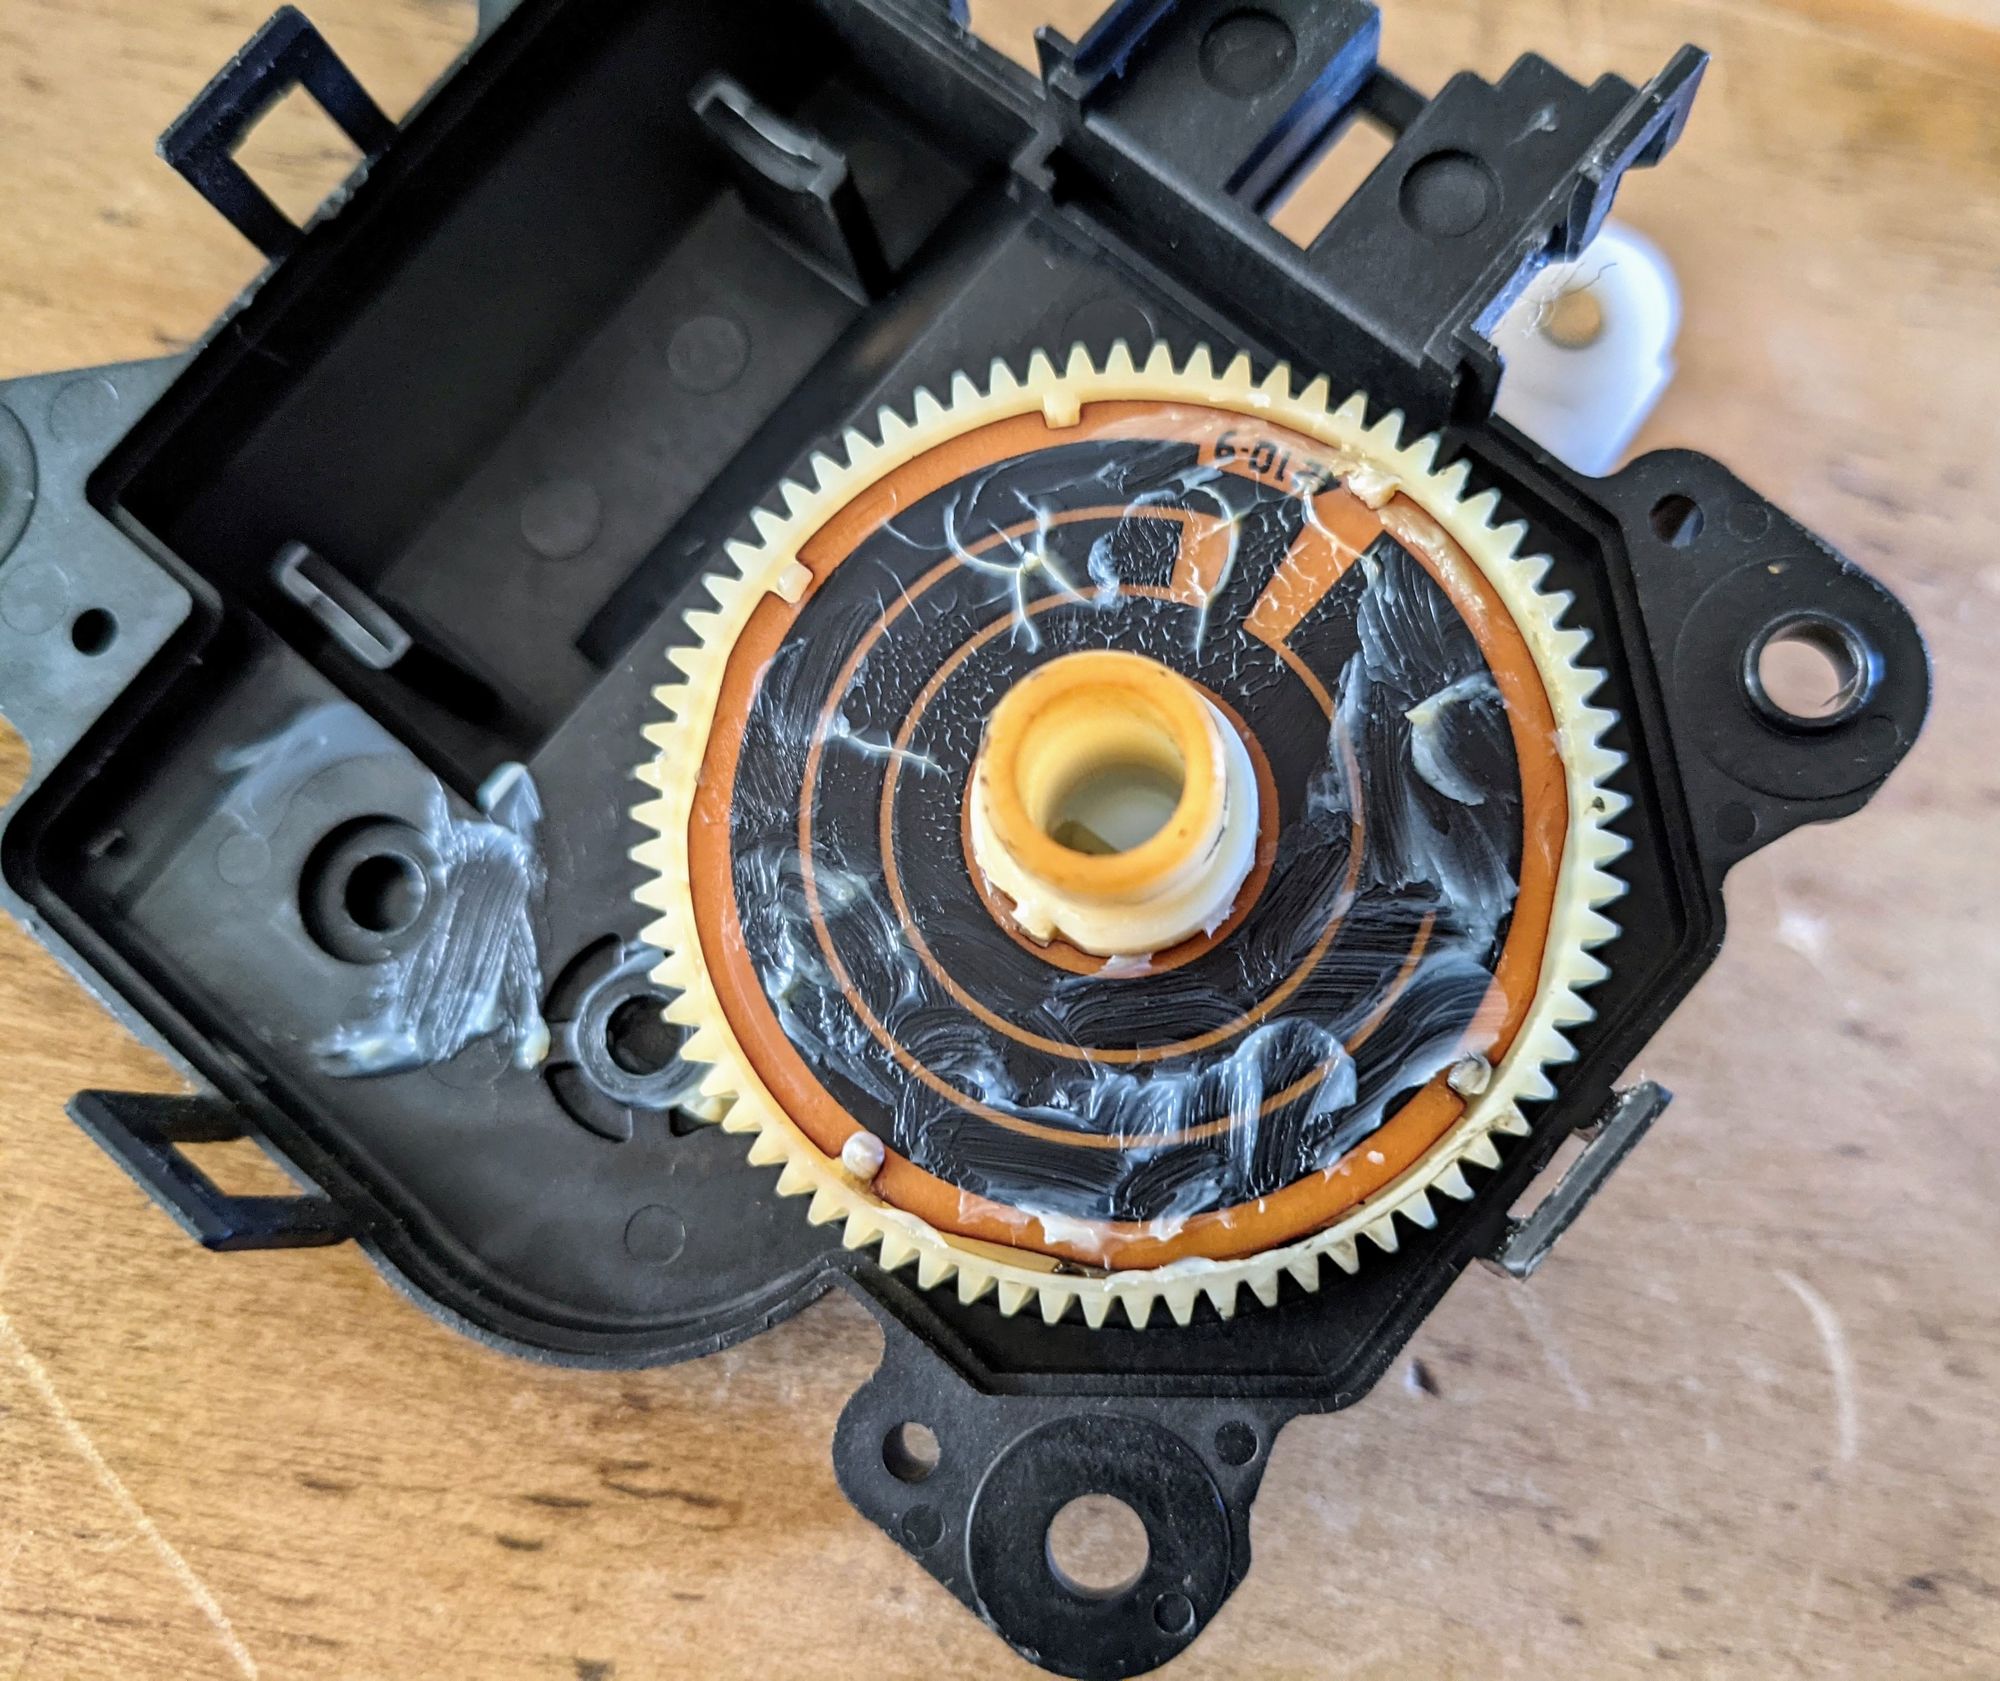
The motor casings then need to be put back together whilst ensuring the arm is in the same place it was when you dismantled it.
Mode-Select Motor
The mode-select motor should be dismantled in the same way as the other motor. Make sure you mark the location of the arm and are careful when prying up the clips.
The mode-select motor operates in the same way as the speed-select motor so should be cleaned in the same way. Unfortunately the resistance material for the potentiometer (the large cog) is reversed. Using a cotton bud with cleaner you should again clean the grease but you will need some judgement as to where the affected area is as you cant necessarily see it.
I found bending the cotton bud into a 'U' shape made it easier to both clean and apply grease as I was able to hook up under the cog.
This job could be made easier if the motor arm could be removed - I investigated this but it appears to be glued in place or at least not meant to be touched.
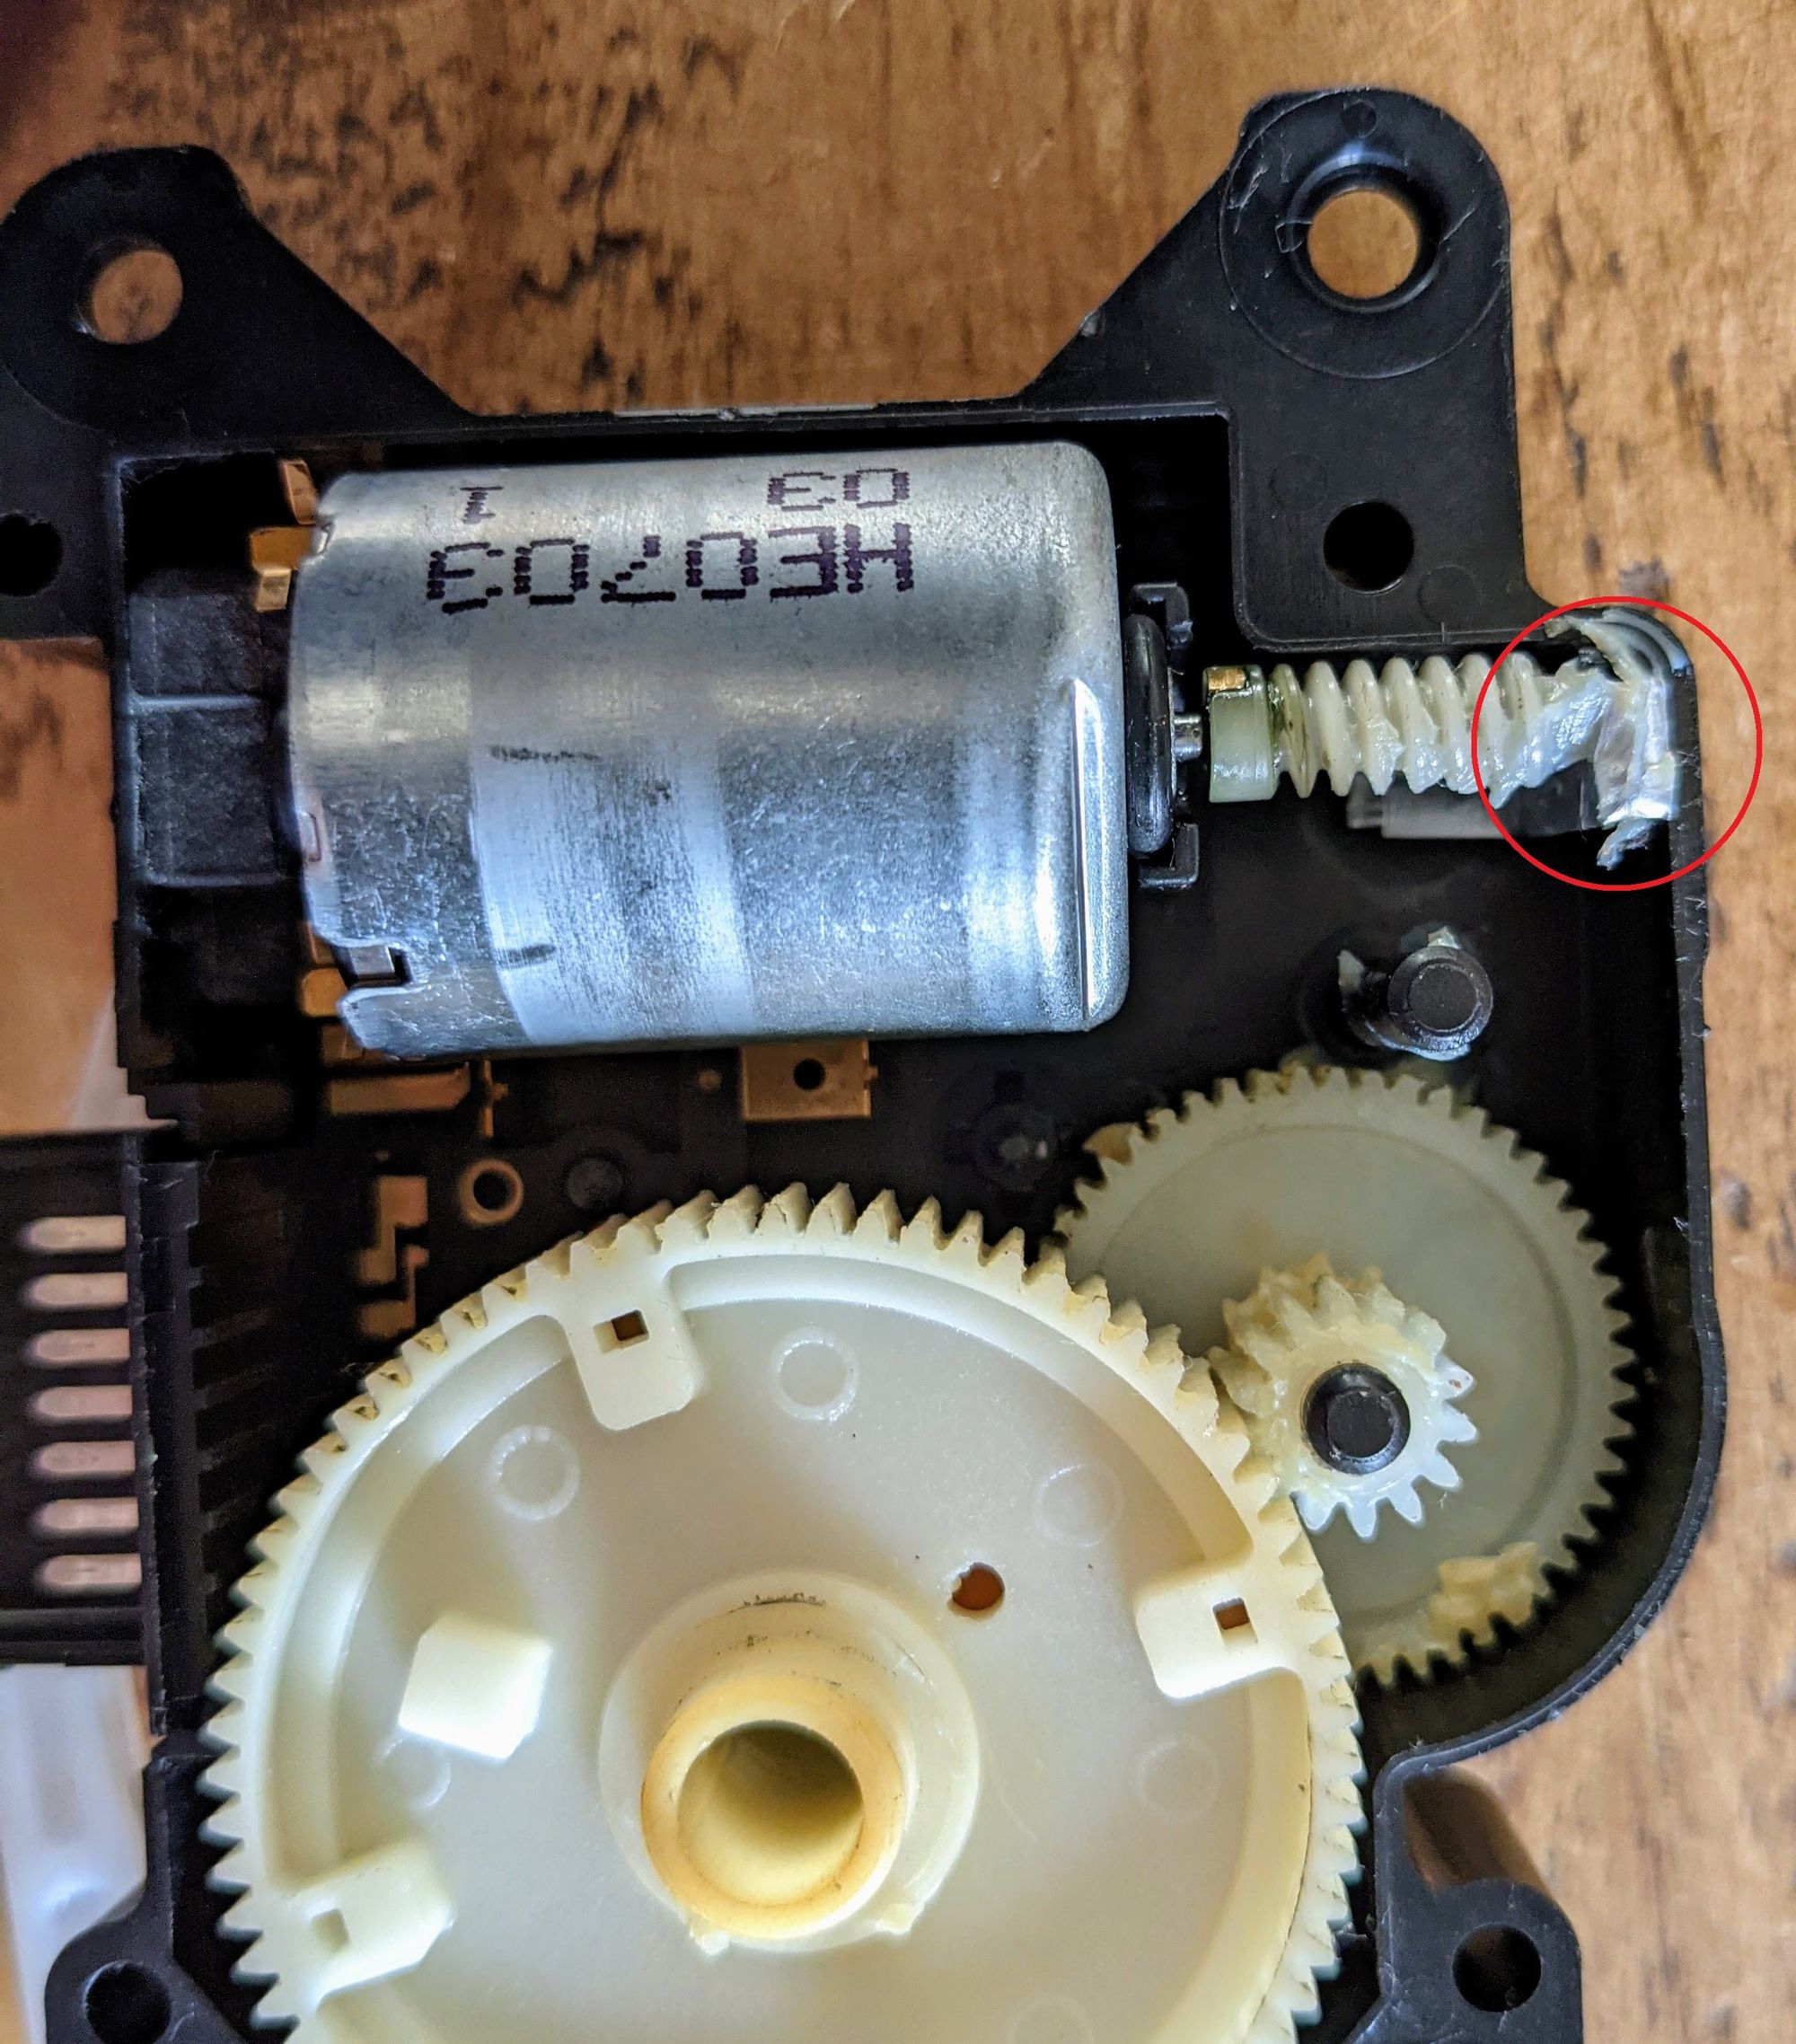
I traced the grinding noise in this motor to the worm drive cog having too much play up and down the motor output shaft, causing it to spin freely without engaging. Here’s a video as its easier to show:
Mode select motor worm gear issue:
To fix this I did 2 things:
- Super glued the worm drive cog in-place on the motor shaft, preventing it from sliding up.
(I also super glued the same worm drive cog on the speed-select motor) - Glued in place a very thin piece of plastic between the worm drive cog and the motor casing to reduce the gap between them. If the worm drive ever comes un-stuck from the motor shaft, I have reduced the play in the cog which mean it continues to be engaged properly.
Installing the Motors
Replacing the motors back into the car is obviously reverse of removal.
The only thing you need to be aware of is ensuring the pins on the end of the motor arms are inserted into the vent mechanisms correctly. They should slot into the grooves to allow the vents to open/close.
References
Very in-depth writeup on Club Lexus: https://www.clublexus.com/forums/gs-2nd-gen-1998-2005/634751-how-to-fix-your-servo-motors-complete-guide.html?fbclid=IwAR05NIwXHdW7xs4XfH2NQRDT14WMZ2qSOe1QeOVFOstQLZgi2Hb1xFzUUqA
Explanation on why the motors go bad and how to fix them: https://www.clublexus.com/forums/gs-2nd-gen-1998-2005/501372-diy-repairing-air-mix-servomotors.html